Create a note for an account

User can create a note in multiple ways for an account. Here is the simple way to create a note

Create a note from the accounts list page:

  • Log in to your Oorwin Account and navigate to Accounts module from the left menu under General Section
  • Select any account name whom you wanted to create a note
  • Click on “N(Notes) symbol” for the account you wanted to create note
  • It opens a popup with the existing notes listed
  • Click on any type(call,note,meeting) of the note
  • Enter all the required fields like name, description, etc
  • Click on Save button below
  • Thats it! Your Note has been created and tagged to the particular account
 

Create a note from the accounts view page:

  • Open any account name whom you wanted to create a note
  • Check for “Notes symbol” on the right panel for the account you wanted to create note
  • Click on that icon and it opens a popup with the existing notes listed
  • Click on any note type(call,note,meeting) that you wanted create
  • Enter all the required fields like name,description,etc
  • Click on Save button below
  • Thats it! Your Note has been created and tagged to the particular account
Create a candidate in Oorwin

Creating a candidate in Oorwin is as simple as brewing a coffee! Whenever you receive a requirement from your client, the first thing you need to do is load all the details in Ooriwn and start searching for the candidate

Below are the steps to follow while creating a job in Oorwin

  • Login to your Ooriwn account and Go to Job module on the left menu under the recruitment section
  • Click on “Add Job” on the top right corner
  • Click “Manual Add” button from the drop down menu
  • Fill all the mandatory fields like Job Title, Client Name, Location..etc
  • Now click on “Save”. Thats It! your job has been created in Oorwin

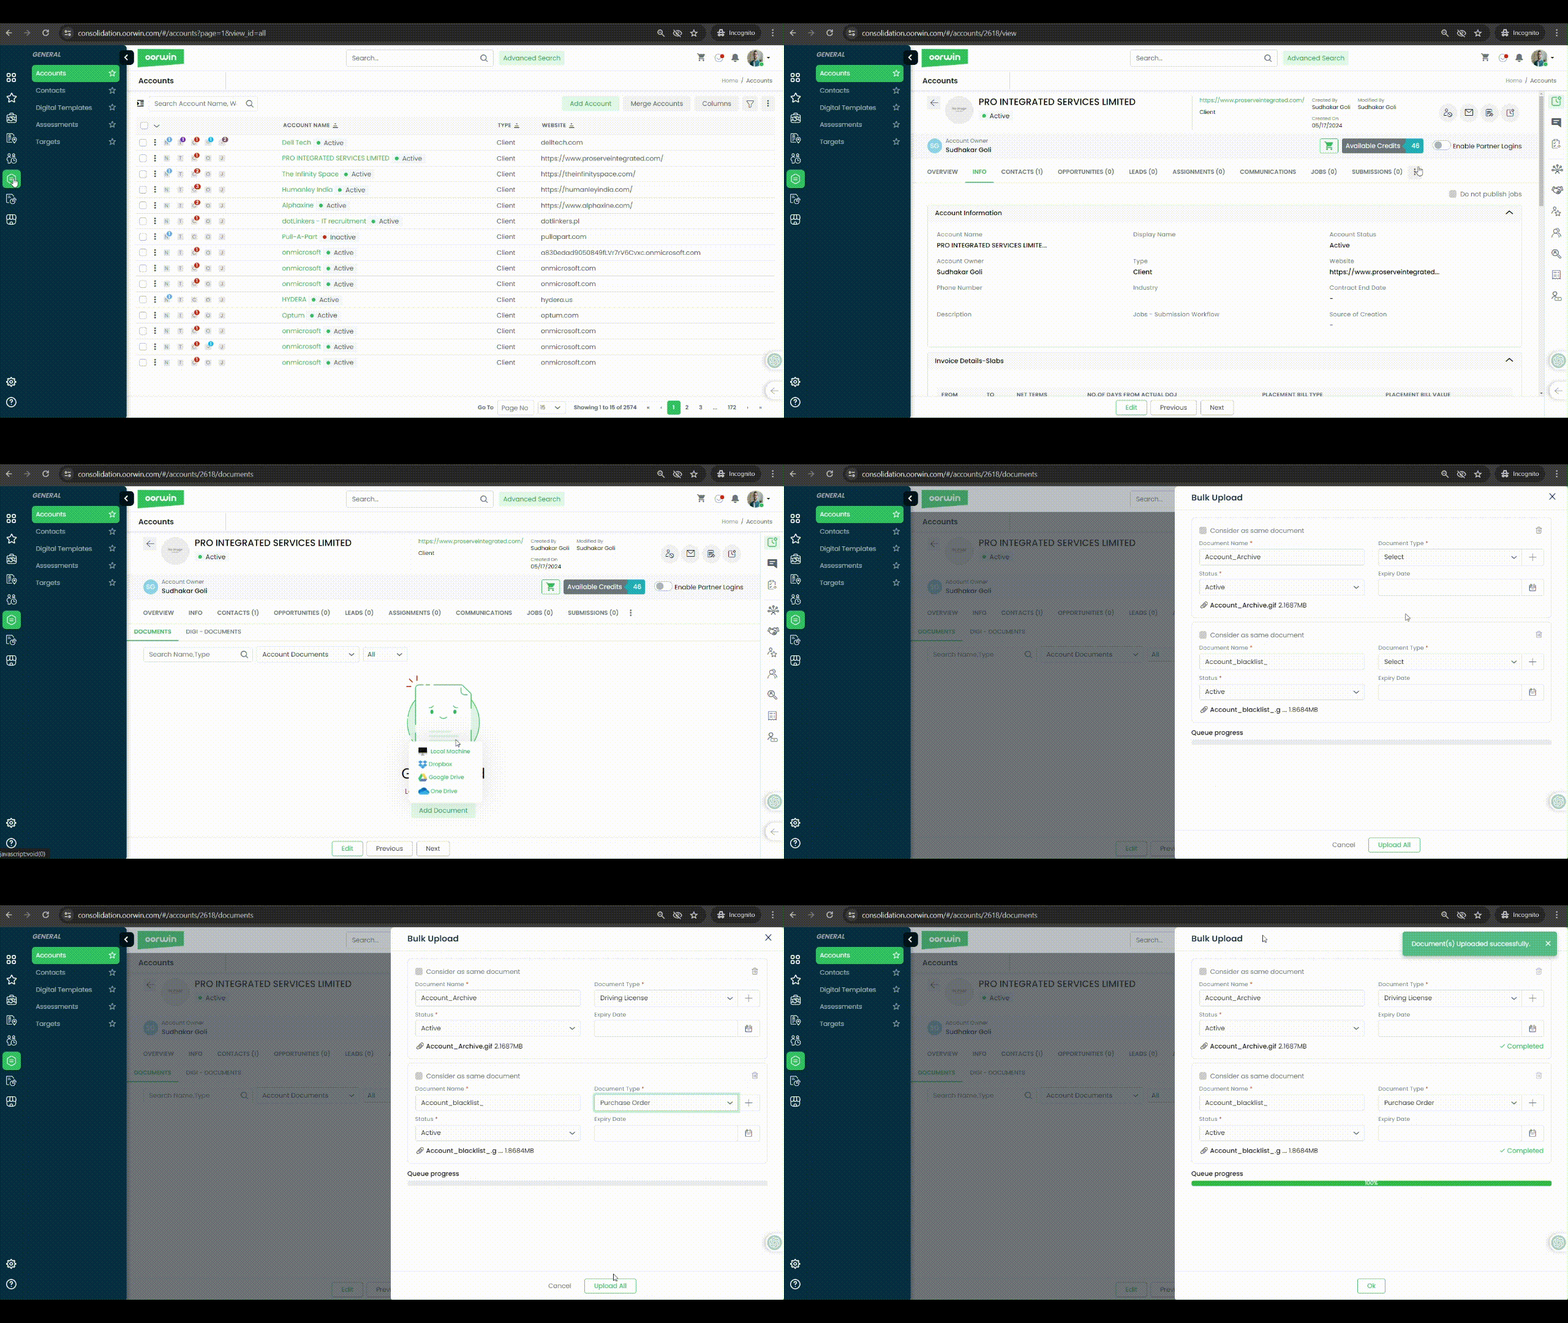
Add document in an account

Accounts module can hold the multple type of documents related to particular account.To do this action you need to have add permission enabled for your role from the Settings->Role security

Please follow the below steps to add a document specific to your account

  • Log in to your Oorwin Account and navigate to Accounts module from the left menu under General Section
  • Click on any account name to whom you wanted to add a document
  • Click on three dots icon on the top header and click on Documents tab in it
  • Click on Add document button and select any of the option from the source list
  • Attach and upload the documents and fill the details and click on Upload button
  • All your documents has uploaded and tagged to specific account

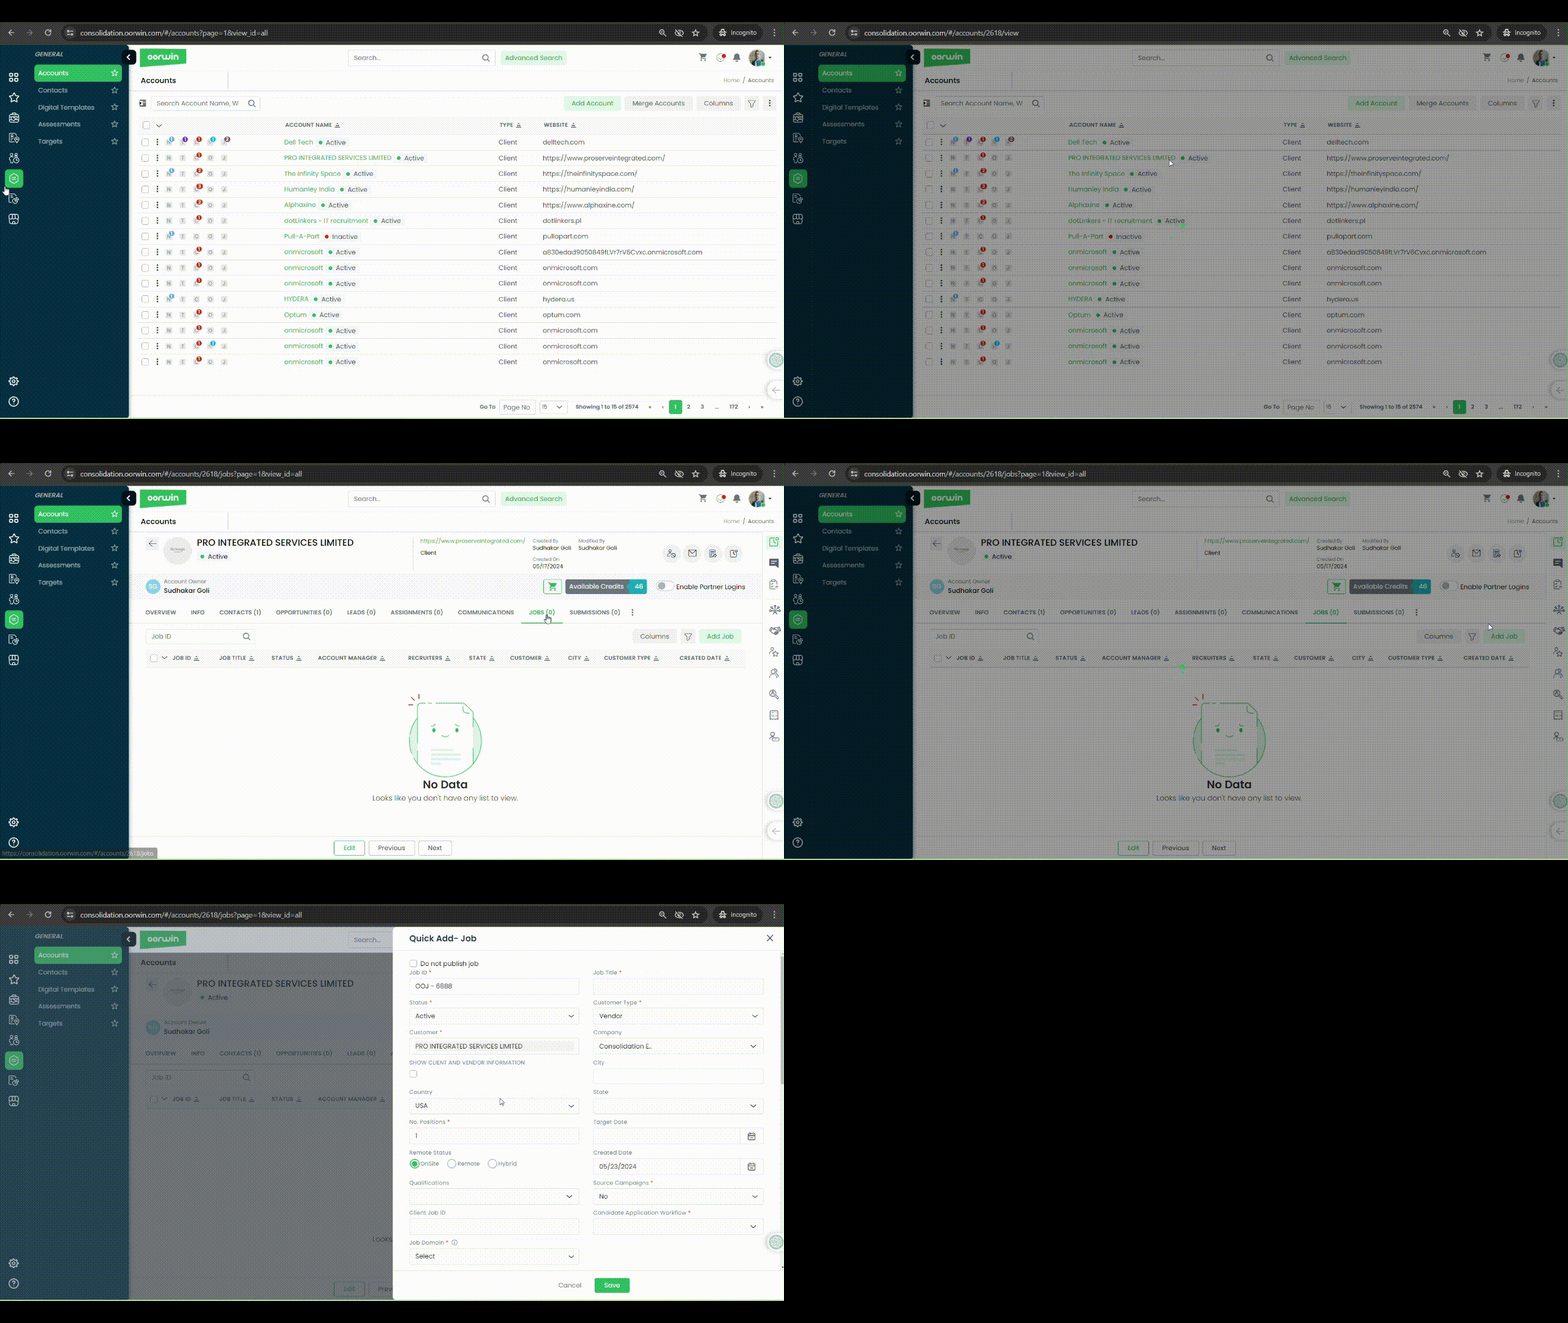
Create a job from account view

User can create a Job requirement from account page which will be tagged to that particular account.

To do this action you need to have add Job permission enabled for your role from the Settings->Role security

Please follow the below steps to create a Job from account view page

  • Log in to your Oorwin Account and navigate to Accounts module from the left menu under General Section
  • Click on any account name to whom you wanted to create a new job
  • Click on Jobs tab on the top header which shows all the jobs tagged to that account
  • Click on Add Job button on the top right corner
  • Fill all the mandatory information and click on Save button
  • Thats it! Your new job has been created and tagged to the particular account
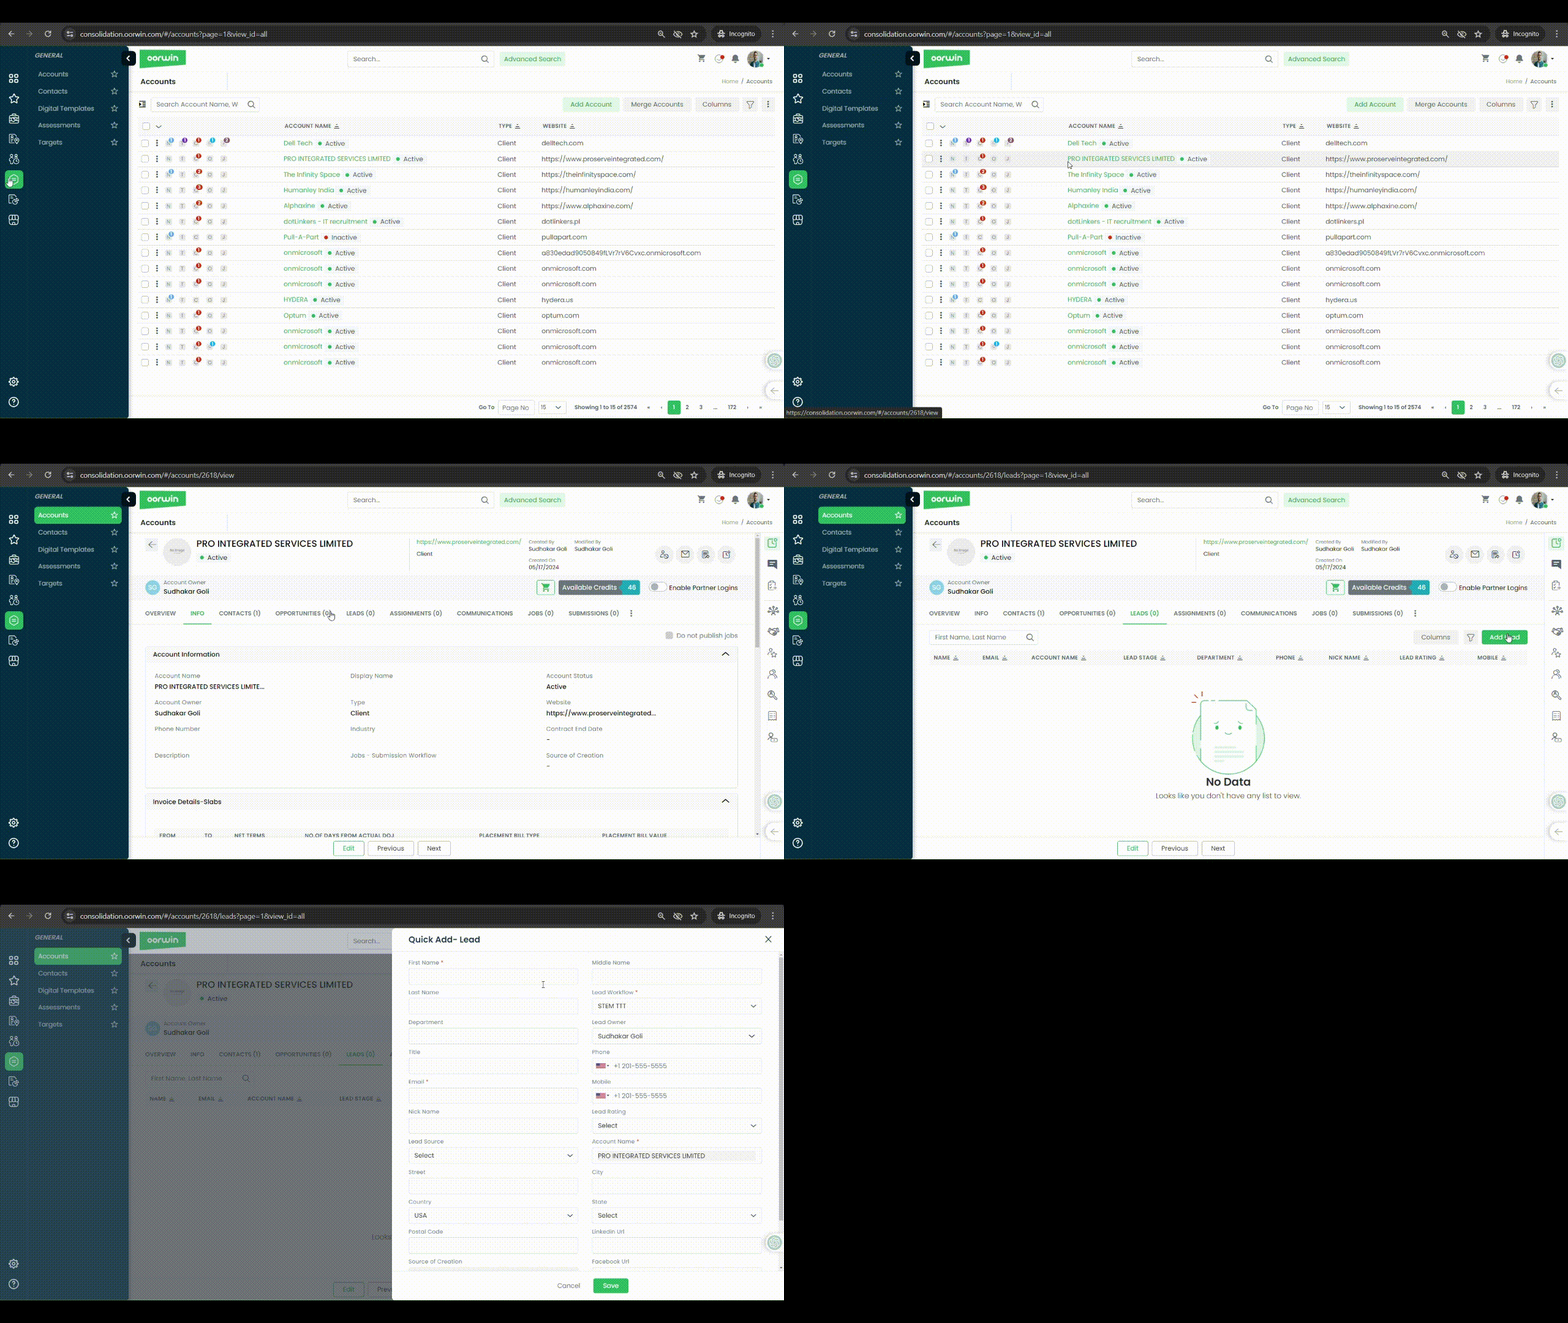
Craete a lead from account page

User can create a lead from account page which will be tagged to that particular account.

To do this action you need to have add lead permission enabled for your role from the Settings->Role security

Please follow the below steps to create a lead from account view page

  • Log in to your Oorwin Account and navigate to Accounts module from the left menu under General Section
  • Click on any account name to whom you wanted to create a new lead
  • Click on Leads tab on the top header which shows all the leads tagged to that account
  • Click on Add Lead button on the top right corner
  • Fill all the mandatory information and click on Save button
  • Thats it! Your Lead has been created and tagged to the particular account
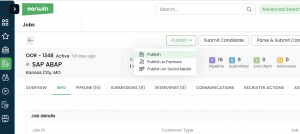
Publish the job on job boards and career portal

This article will guide you through the process of publishing the job on job boards.

Below are the steps to follow publishing the job on job boards.

  • Login to your Oorwin account and Go to Jobs module on the left menu under the recruitment section.
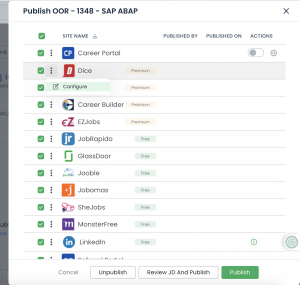
  • Select the job > Click on Publish button > Click on Publish on job boards
  • Select the career portal and the job boards from the list which would like to publish To.
  • Fill the mandatory fields of respective job boards by clicking on Actions > Configure.
  • Finally, click on Publish, the job will be published on all selected job boards and will start receiving the applications.

Note: The user should be allocated with the credits by the account admin

Publish the job on social media

This article will guide you through the process of publishing the job on social media.

Below are the steps to follow publishing the job on social media.

  • Login to your Oorwin account and Go to Jobs module on the left menu under the recruitment section.
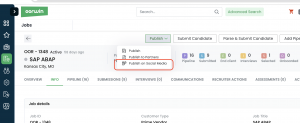
  • Open the job > Click on Publish button > Click on Publish on Social media.
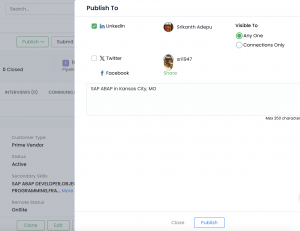
  • Choose the platforms which would like to publish To.
  • Enter the comments(If required) and click on publish.

Add a candidate in Oorwin

This article will guide you through the process of creating a new candidate in our system.

Below are the steps to follow while creating a candidate in Oorwin

  • Login to your Ooriwn account and Go to Candidate module on the left menu under the recruitment section
  • Click on “Add Candidate” or “Parse Resume”
  • ADD Candidate: Fill all the mandatory fields manually, like Candidate name, Job title, Experience..etc
  • Parse Resume: select the resume attachment from local drive and click on Yes
  • Now click on “Save”. Thats It! your candidate has been created in Oorwin

Create an opportunity from account page

If you want to add an Opportunity tagged to a particular account, then yoou can do it from the account view page which will tag it to the same account.

To do this action you need to have add opportunity permission enabled for your role from the Settings->Role security

Please follow the below steps to create an opportunity from account view page

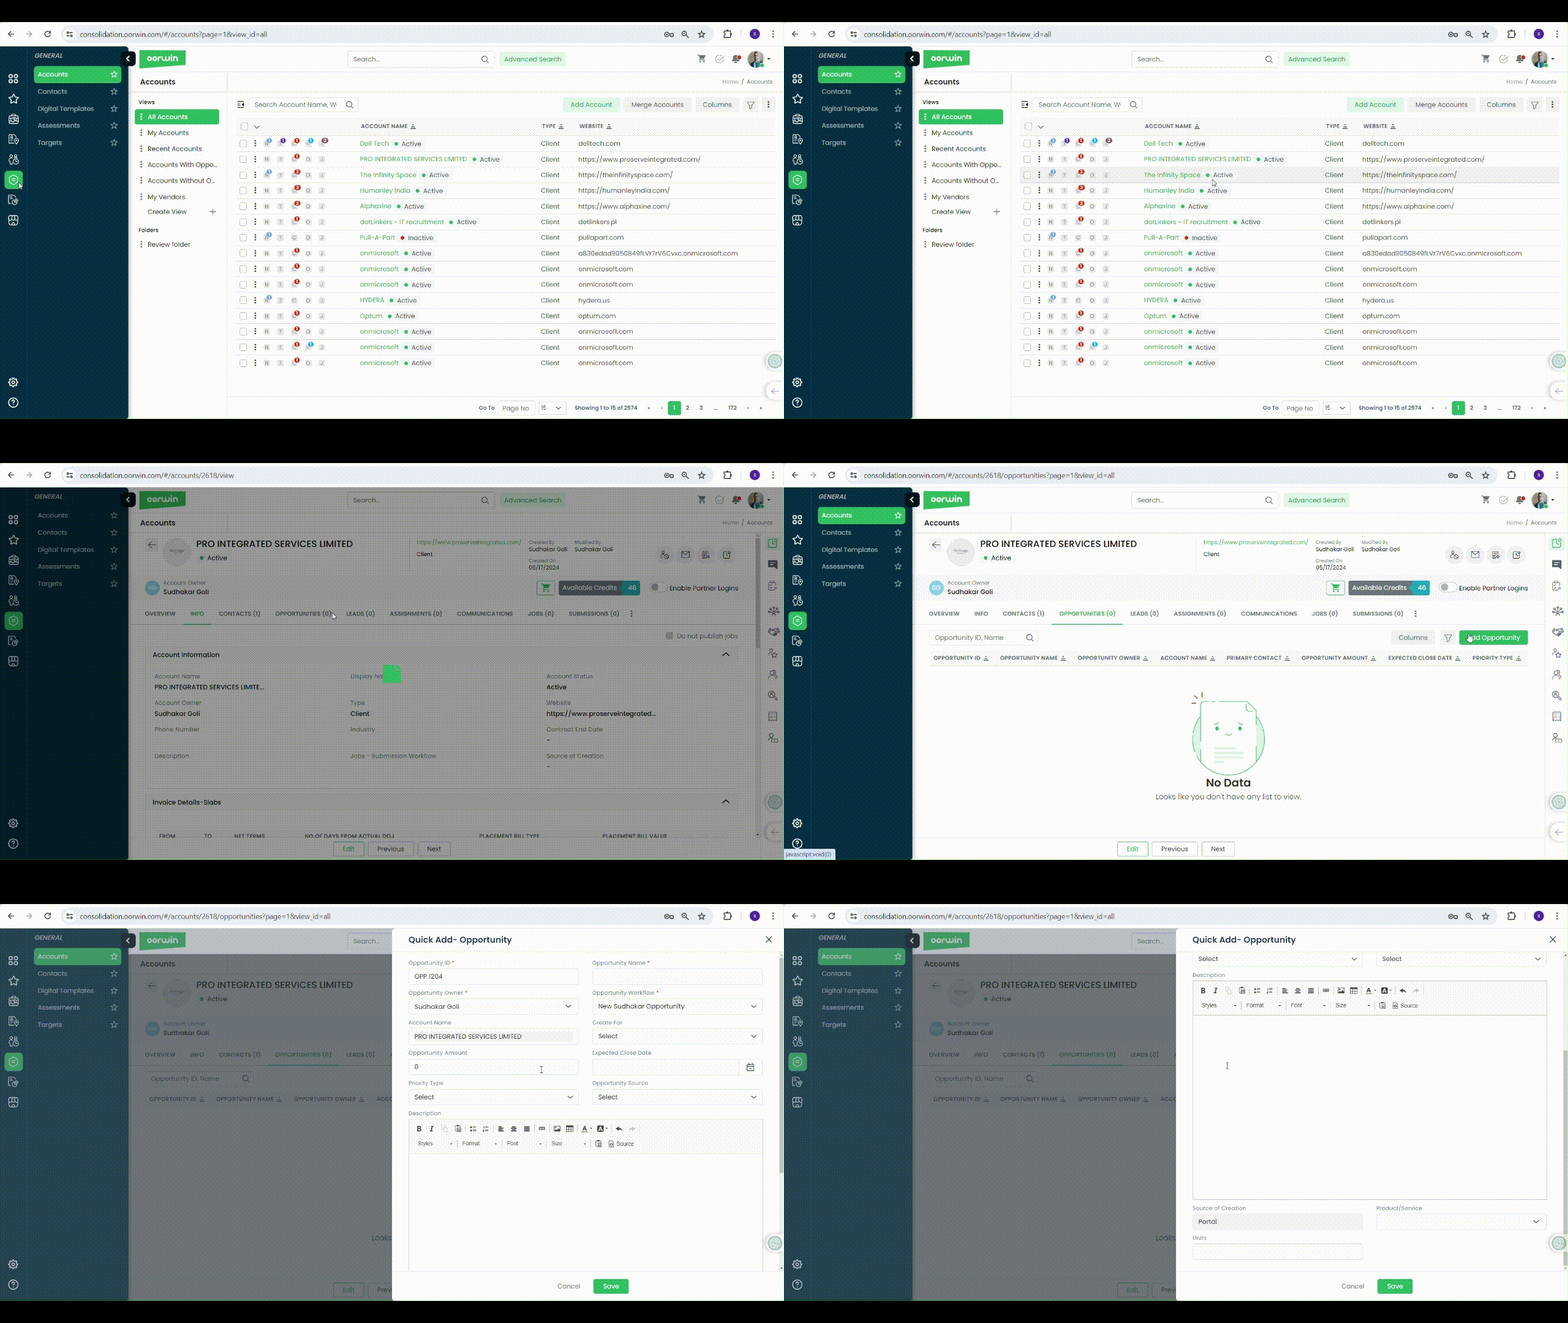
  • Log in to your Oorwin Account and navigate to Accounts module from the left menu under General Section
  • Click on any account name to whom you wanted to create a new opportunity
  • Click on Opportunities tab on the top header which shows all the opportunities tagged to that account
  • Click on Add Opportunity button on the top right corner
  • Fill all the mandatory information and click on Save button
  • Thats it! Your opportunity has been created and tagged to the particular account
Send an email to account contact

You can send an email to the account contact through Oorwin portal by following below steps

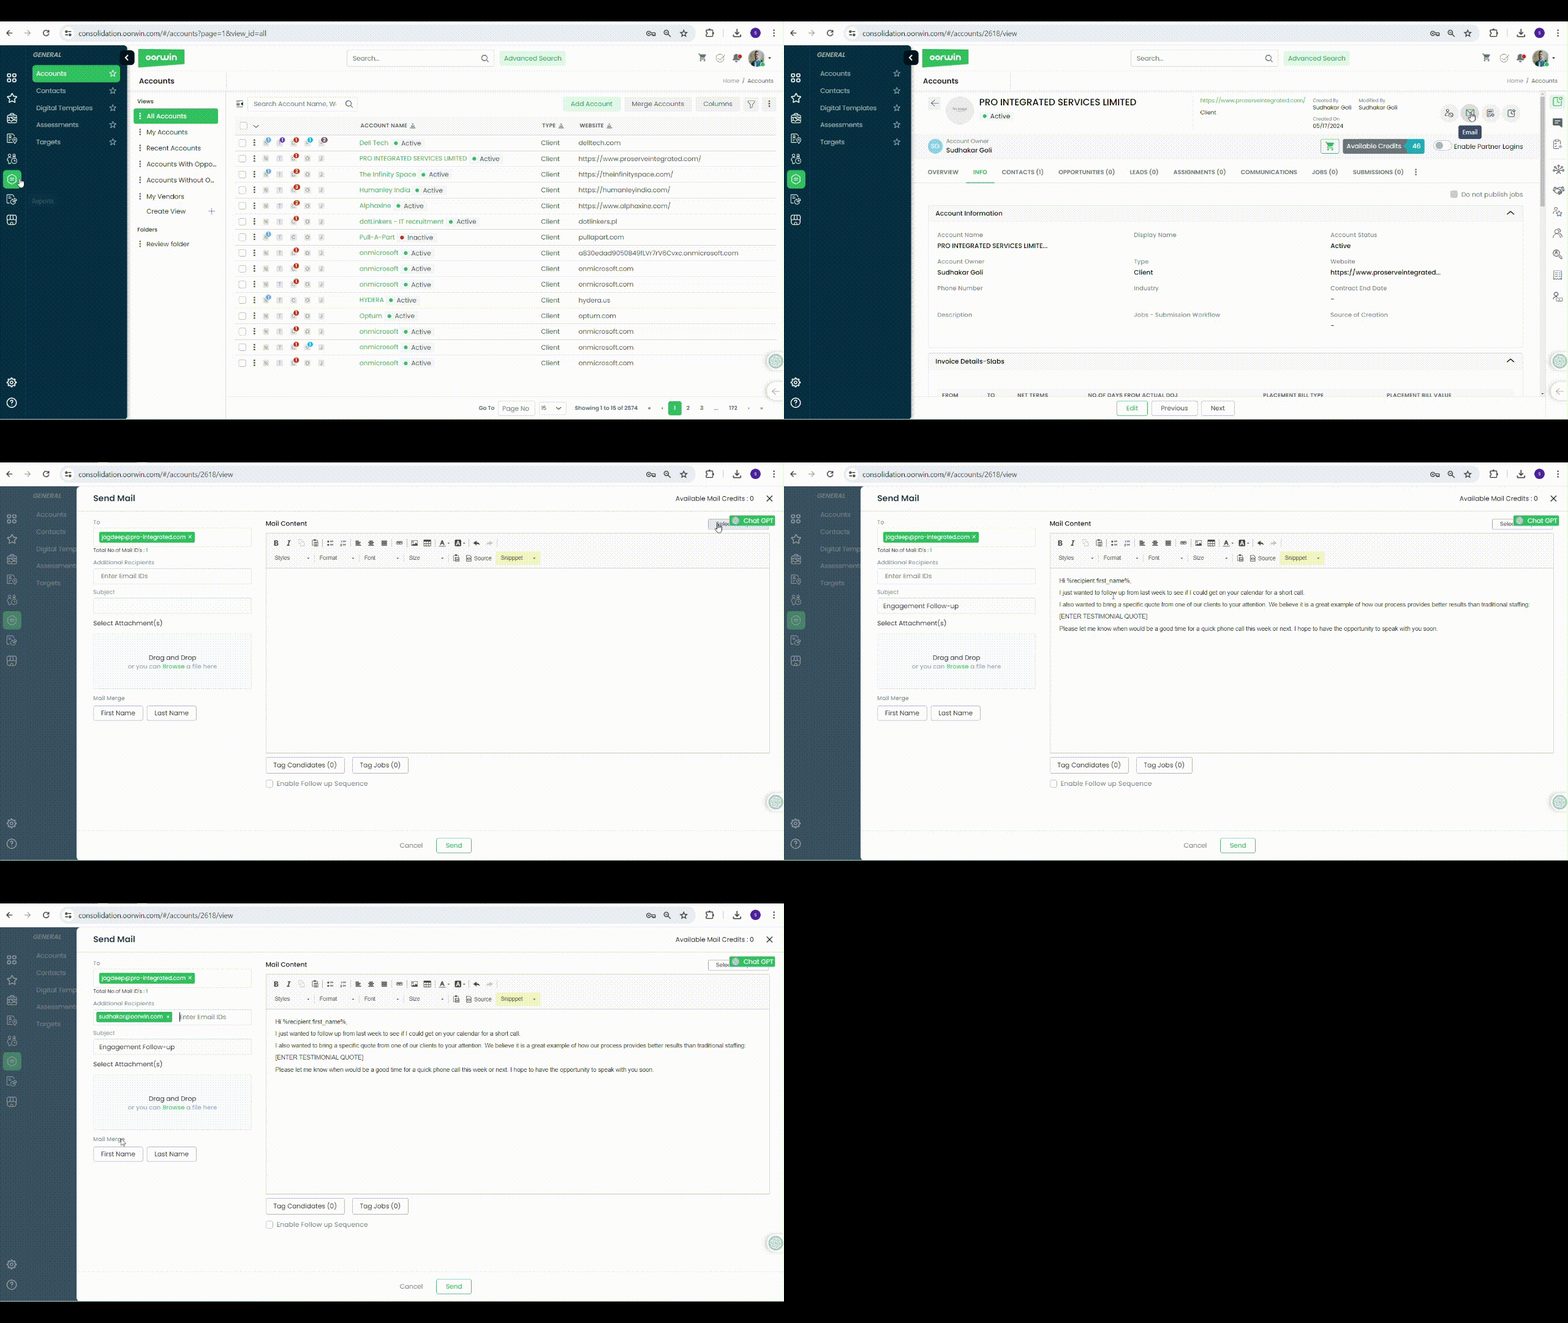
  • Log in to your Oorwin Account and navigate to Accounts module from the left menu under General Section
  • Click on any account name to whom you want to send an email to the contact
  • Click on Compose Email button on the top right corner
  • You can select the pre defined email templates or enter your own content in the email body
  • Enter any additional recipients in the CC field and add Subject on your own
  • You can add attachments also from the select attachements section
  • User can also use the mail merge option to replace with the name of the receiver in the mail body
  • Once you are done with all the content then click on Send button to send the email to your receivers