This article will guide you through the process of creating a new candidate in our system.
Below are the steps to follow while creating a candidate in Oorwin
- Login to your Ooriwn account and Go to Candidate module on the left menu under the recruitment section
- Click on “Add Candidate” or “Parse Resume”
- ADD Candidate: Fill all the mandatory fields manually, like Candidate name, Job title, Experience..etc
- Parse Resume: select the resume attachment from local drive and click on Yes
- Now click on “Save”. Thats It! your candidate has been created in Oorwin
Accounts module can hold the multple type of documents related to particular account.To do this action you need to have add permission enabled for your role from the Settings->Role security
Please follow the below steps to add a document specific to your account
- Log in to your Oorwin Account and navigate to Accounts module from the left menu under General Section
- Click on any account name to whom you wanted to add a document
- Click on three dots icon on the top header and click on Documents tab in it
- Click on Add document button and select any of the option from the source list
- Attach and upload the documents and fill the details and click on Upload button
- All your documents has uploaded and tagged to specific account
You can create an approval flow for the invoices that has been raised in the system, so that all the invoices will be triggered to the assigned approvers before it goes to the client’s inbox
Please follow the below steps to approve/reject the invoice
- Log in to your Oorwin Account and navigate to Invoices module from the left menu under Human Resources Section
- You will find a tab called “Approvals” on the top and click on it
- You can find the number of invoices that were pending for approval on your side in the Assigned to me section
- Click on three dots for the specific invoice that you wanted to take an action
- It shows approve or reject buttons and you can click on any of the action on it
- Now your pending invoice has taken care and will be sent to the next level user in the flow
- If you are a system admin you can also find or approve all the pending invoice from the Approve as Admin section

If you are no longer needed a particular account then you can archive that account which will land in the archivals module. You can restore the same record from there if you needed it again.
To do this action you need to have delete access permission enabled for your role from the Settings->Role security
Please follow the below steps to archive the account
- Log in to your Oorwin Account and navigate to Accounts module from the left menu under General Section
- Click on “Actions(three dots)” icon for the account you wish to archive.
- Click on Archive link from the list (You need to have account delete access permission)
- Click on Yes on the confirmation popup
- By this action your account will be archived and will be landed in the Archivals module
This action will not delete your account permanently from the system and you can restore the same record again when ever you needed
Please note that you cannot delete an account which has associated with any of the modules like jobs, submissions, assignments, candidates, etc

If you are any business related issues with a particular account then you can blacklist that account which would not showcase that account in all over the application.
To do this action you need to have edit permission enabled for your role from the Settings->Role security
Please follow the below steps to blacklist the account
- Log in to your Oorwin Account and navigate to Accounts module from the left menu under General Section
- Click on any account name to whom you wanted to blacklist, which opens the account view page.
- Click on Blacklist icon on the top right corner
- Click on Yes on the confirmation popup
- By this action your account will be blacklisted and it shows in red colour (blacklisted) in your listing page

- You can unblock the account from the same option where you can perform all your regular operations on it
User can create a lead from account page which will be tagged to that particular account.
To do this action you need to have add lead permission enabled for your role from the Settings->Role security
Please follow the below steps to create a lead from account view page
- Log in to your Oorwin Account and navigate to Accounts module from the left menu under General Section
- Click on any account name to whom you wanted to create a new lead
- Click on Leads tab on the top header which shows all the leads tagged to that account
- Click on Add Lead button on the top right corner
- Fill all the mandatory information and click on Save button
- Thats it! Your Lead has been created and tagged to the particular account
Creating a candidate in Oorwin is as simple as brewing a coffee! Whenever you receive a requirement from your client, the first thing you need to do is load all the details in Ooriwn and start searching for the candidate
Below are the steps to follow while creating a job in Oorwin
- Login to your Ooriwn account and Go to Job module on the left menu under the recruitment section
- Click on “Add Job” on the top right corner
- Click “Manual Add” button from the drop down menu
- Fill all the mandatory fields like Job Title, Client Name, Location..etc
- Now click on “Save”. Thats It! your job has been created in Oorwin
If you want to add a contact tagged to a particular account, then yoou can do it from the account view page which will tag to the same account.
To do this action you need to have add contact permission enabled for your role from the Settings->Role security
Please follow the below steps to create a contact from account view page
- Log in to your Oorwin Account and navigate to Accounts module from the left menu under General Section
- Click on any account name to whom you wanted to create a new conatct
- Click on contacts tab on the top header which shows all the contacts available to that account
- Click on Add Contact button on the top right corner
- Fill all the mandatory information and click on Save button
- Thats it! Your conatct has been created and tagged to the particular account
Creating a contact record in Oorwin is like adding a new friend to your phonebook. Here’s how you can do it:
- Log in to your Oorwin Account and navigate to Contacts module from the left menu under General Section
- Click on “Add Contact” button on the top right corner.
- Fill all the mandatory details like name,email,phone number, etc.
- Once you’ve filled in all the necessary information, click on the “Save” button on the bottom
- And that’s it! You’ve just added a new contact record in Oorwin.
User can create a Job requirement from account page which will be tagged to that particular account.
To do this action you need to have add Job permission enabled for your role from the Settings->Role security
Please follow the below steps to create a Job from account view page
- Log in to your Oorwin Account and navigate to Accounts module from the left menu under General Section
- Click on any account name to whom you wanted to create a new job
- Click on Jobs tab on the top header which shows all the jobs tagged to that account
- Click on Add Job button on the top right corner
- Fill all the mandatory information and click on Save button
- Thats it! Your new job has been created and tagged to the particular account
User can create a note in multiple ways for an account. Here is the simple way to create a note
Create a note from the accounts list page:
- Log in to your Oorwin Account and navigate to Accounts module from the left menu under General Section
- Select any account name whom you wanted to create a note
- Click on “N(Notes) symbol” for the account you wanted to create note
- It opens a popup with the existing notes listed
- Click on any type(call,note,meeting) of the note
- Enter all the required fields like name, description, etc
- Click on Save button below
- Thats it! Your Note has been created and tagged to the particular account
Create a note from the accounts view page:
- Open any account name whom you wanted to create a note
- Check for “Notes symbol” on the right panel for the account you wanted to create note
- Click on that icon and it opens a popup with the existing notes listed
- Click on any note type(call,note,meeting) that you wanted create
- Enter all the required fields like name,description,etc
- Click on Save button below
- Thats it! Your Note has been created and tagged to the particular account
Users can rely on tasks for assigning work to specific modules, tracking progress, and ensuring notification to each team member.
Here is how you can create a task for an account and get it tracked
- Log in to your Oorwin Account and navigate to Accounts module from the left menu under General Section
- Click on any account name to whom you want to Create a task
- Search for Tasks icon on the right panel and click on it
- It opens a popup with all the tasks that all your team created
- Click on Add task button on the top right corner
- Enter all the required fields like title, description, due date, reminder, assigned to, etc
- User can also tag this task to a contact available on this account
- Now click on save on the bottom and thats it, your task has created and notified to the assigned user
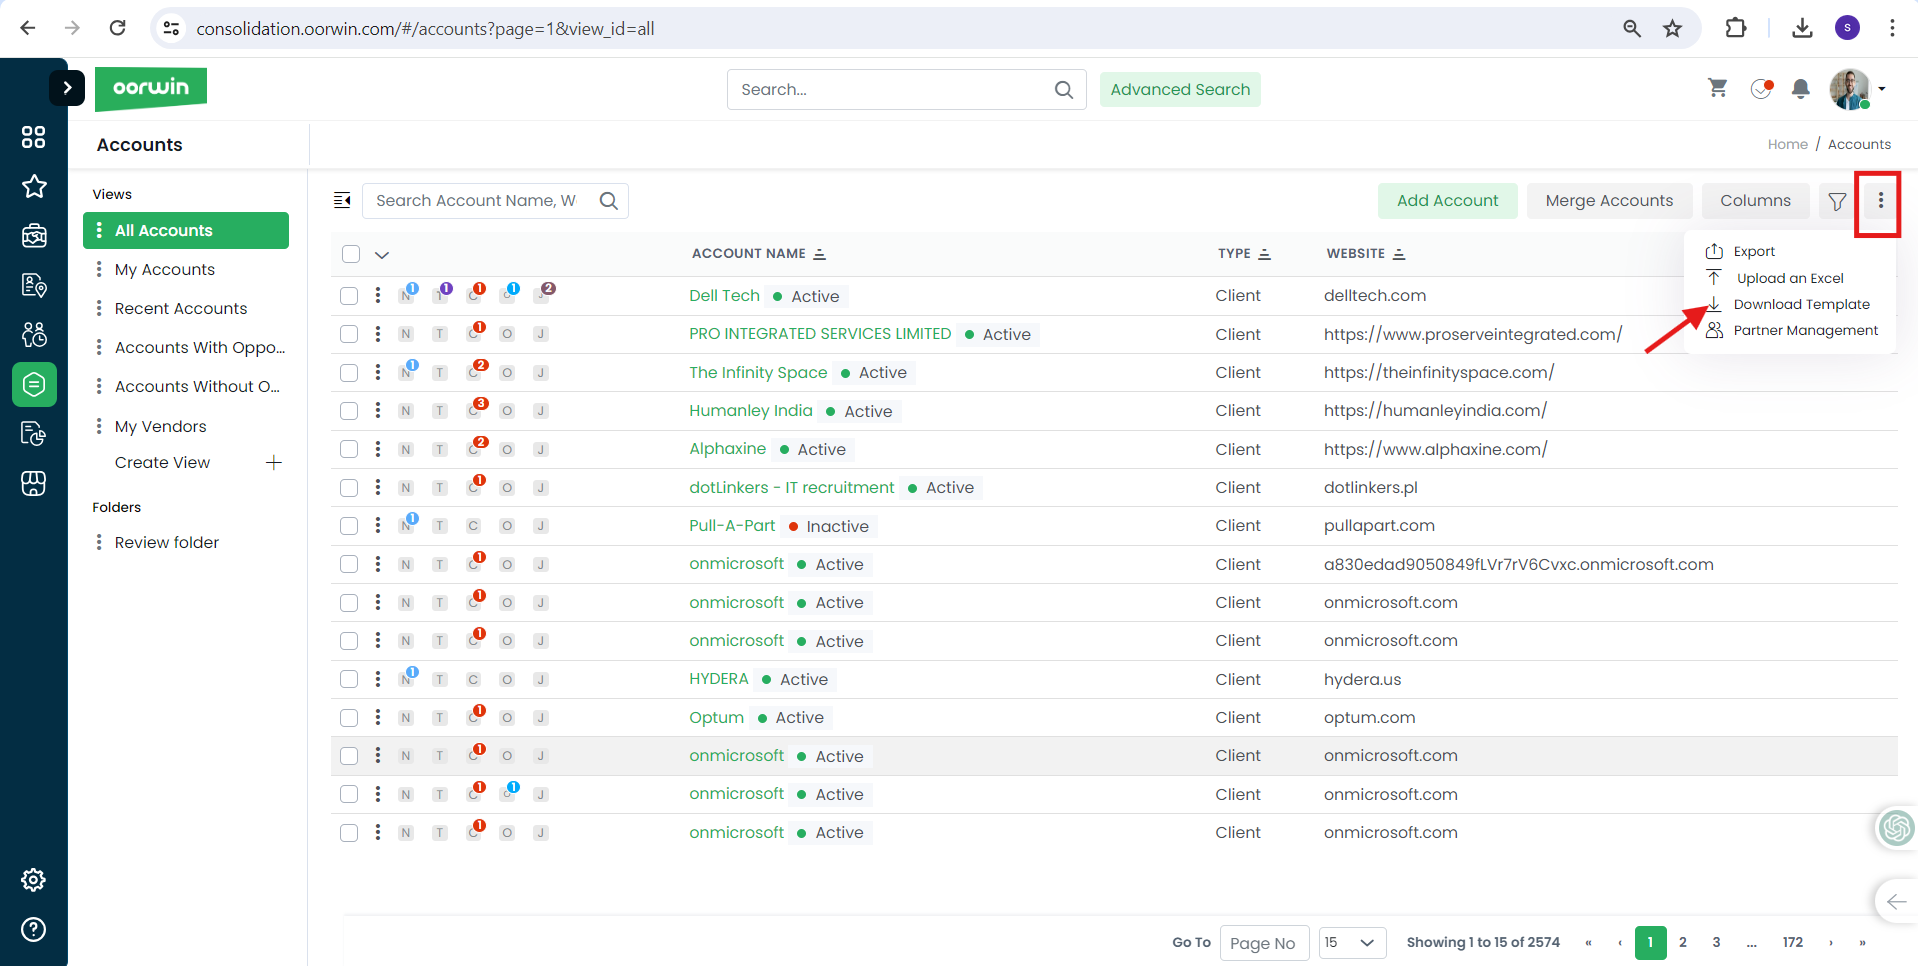
To import accounts through an excel sheet first you need download the accounts template fromat through below steps
- Log in to your Oorwin Account and navigate to Accounts module from the left menu under General Section
- Click on “More(three dots)” icon on the top right corner
- Click on Downaload Template option from the drop down list
- An excel template will be downloaded with all the account field coluns which you need to fill all the accounts data in it
- Once you have filled all the account details in the excel sheet you need to upload it through Upload Excel option
- Now system will ask you to check all the details mapped exactly with the excel fields
- Then click on Save button on the bottom to export all the data to Accounts module
- Once it is exported, a success notification will be displayed in the Notifications section on the top
Creating an Account record in Oorwin is as simple as below:
- Log in to your Oorwin Account and navigate to Accounts module from the left menu under General Section
- Click on “Add Account” button on the top right corner.
- Fill all the required information like Account Name,type,Phone number, etc.
- Then click on “Save” button on the bottom
- And that’s it! Your account has created

Creating an employee record in Oorwin typically involves following steps:
- Log in to your Oorwin Account and navigate to Employees module from the left menu under Human Resources Section
- Click on “Add Employee” button on the top right corner.
- Fill all the mandatory details like Personal Information, Employment Details, Education Details,Documents, etc.
- Once you’ve filled in all the necessary information, click on the “Save” button below
- Thats it! A new employee record has been created in Oorwin.

If you want to add an Opportunity tagged to a particular account, then yoou can do it from the account view page which will tag it to the same account.
To do this action you need to have add opportunity permission enabled for your role from the Settings->Role security
Please follow the below steps to create an opportunity from account view page
- Log in to your Oorwin Account and navigate to Accounts module from the left menu under General Section
- Click on any account name to whom you wanted to create a new opportunity
- Click on Opportunities tab on the top header which shows all the opportunities tagged to that account
- Click on Add Opportunity button on the top right corner
- Fill all the mandatory information and click on Save button
- Thats it! Your opportunity has been created and tagged to the particular account

If you would like to update a contact information you need to have a edit access for the contact module which can be enabled from the Settings->Role security by the Admin
Follow the below steps to edit and update the contact record
- Log in to your Oorwin Account and navigate to Contacts module from the left menu under General Section
- Click on “Actions(three dots)” icon for the contact you wish to update.
- Click on Edit link from the list (You need to have account edit access to have this link)
- Enter all the details you wish to update in the respective fields
- Then click on “Update” button on the bottom
- And that’s it! Your Contact has been updated with the new details

Follow the below steps to edit and update the account record
- Log in to your Oorwin Account and navigate to Accounts module from the left menu under General Section
- Click on “Actions(three dots)” icon for the account you wish to update.
- Click on Edit link from the list (You need to have account edit access to have this link)
- Enter all the details you wish to update
- Then click on “Update” button on the bottom
- And that’s it! Your account has been updated with the new details

Adding a Page Break in Advanced Digital Templates
Users can add a page break in a continuous digital document to move content to a new page.
To achieve this:
- Navigate to Menu -> General -> Digital Templates -> Design (Advanced Digital Template) / (Create – Design).
- Add or edit a section.
- Turn on the Page Break option at the section where you want the new page to start.
- Save your changes.
You can preview the areas where page breaks have been added and see how it looks by switching on the preview option. You can also check a PDF preview by clicking on the PDF preview option at the top.
Note: If there are merge fields in your Advanced Digital Template, the preview might not accurately reflect the content, as merge fields will be replaced with actual information, which may have varying character lengths.
There is an archival option for all the campaign templates that you have created in your system which helps you to do the soft delete from the system and you can also roll back them whenever you wanted
Here is how you can archive the campaign templates and snippets
- Log in to your Oorwin Account and navigate to Campaigns module from the left menu under Sales Section
- You will find a tab called Email Templates & Snippets
- You will have all the list of templates like text,graphical,hotlist & snippets on the left side
- Select the template on which type you wanted to archive and then click on three dots icon for that template
- You will find an option called Archive on the actions drop down
- Click on Archive and click on yes on the confirmation box
- Now your template got archived and you cannot no longer access to that template
- You can also find the archived records in My profile->Archivals to restore them at any time
Creating a job in Oorwin is as simple as brewing a coffee! Whenever you receive a requirement from your client, the first thing you need to do is load all the details in Ooriwn and start searching for the candidate
Below are the steps to follow while creating a job in Oorwin
- Login to your Ooriwn account and Go to Job module on the left menu under the recruitment section
- Click on “Add Job” on the top right corner
- Click “Manual Add” button from the drop down menu
- Fill all the mandatory fields like Job Title, Client Name, Location..etc
- Now click on “Save”. Thats It! your job has been created in Oorwin
Additional Options:
- Parse Text: This option allows you to import job details by pasting a text description directly into Oorwin.
- Parse Attachment: Similar to parsing text, you can upload a document containing the job description and Oorwin will attempt to extract the relevant information.
If any of the employee doesn’t have an active assignment at this moment then we will consider them as bench employees and you can verify them in employees module all at once
Here is how you can view the list of bench employees
- Log in to your Oorwin Account and navigate to Employees module from the left menu under Human Resources Section
- You will find all the default views on the left panel
- Look for the default view called “Employees on Bench” and click on it
- This will list of all the bench employees who doesn’t have an active assignment at this moment
- You can also make this view as default by clicking on three dots->set as default
You can check all the actions that everyone has done on the account as an activity log at any point of time.
Below are the steps to verify the activity log for an account
- Log in to your Oorwin Account and navigate to Accounts module from the left menu under General Section
- Click on any account name to whom you want to verify the activity log
- Search for Activities icon on the top or click on activities button on the right panel
- It opens a popup with all the activities that all your team did on it
- User can also search/filter the activities based on the action or user from the filter drop down
- You can also verify the other module activity log linked to that particular account
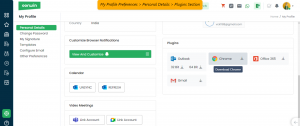
- Go to Your Profile > My Profile & Preferences
- You will be redirected to “Personal Details”. Locate “Plugins” section with in the Page
- You will find chrome plugin. Click on Download option
- You will be redirected to “Chrome Webstore”
- Click on install and chrome extension will be added to the browser
- Go to Gmail, Linked In or WhatsApp web in the browser
- Click on the Oorwin Icon and provide your Oorwin credentails
- Click on Login and increase your production with Oorwin Plugins
About HWL VMS:
HWL is a company that comes to the market with deep expertise from leading healthcare GPOs and supply chain, workforce management software providers, healthcare delivery organizations, cutting-edge technology organizations, and leading staffing agencies.
Our workforce solutions deliver results that lower overall costs, produce higher quality of staff, and increase visibility into overall labor activity and metrics.
Integration HWL vms in Oorwin typically involves following steps:
- Log in to your Oorwin Account and navigate to Marketplace module from the left menu.
- Select VMS category and click on HWL from the list.
- Click on Configure tab > Add VMS
- Enter the Username and Password and other relevant mapping fields and Save
- Once the details saved, click on Actions icon > Copy Webhook url.
- Copy the Access token url and supplier end point url.
- Log in to your admin HWL vms account and navigate to Date Services from the menu.
- Click on Job Order Data and past the Access token url and supplier end point url > Save.
- Once the details saved in HWL, the jobs will be auto created directly into oorwin.
If you find two accounts are similar in Oorwin, you can merge those two accounts as one with all the information in one account. You can merge maximum three accounts as one at a time.
To merge the acocunts just follow the below steps:
- Log in to your Oorwin Account and navigate to Accounts module from the left menu under General Section
- Click on “Merge Accounts” button on the top right corner.
- Enter the account name in the select the account field and select the two accounts from the drop down you wish to merge
- Once you select the accounts click on Next at the bottom
- Select the Master account and the field values to which you want to merge all the data to one
- Click on Merge button on the bottom and then click Conform on the confirmation box to update all the data to master record
- The second account will automatically removed from the system once the merging is done
This article will guide you through the process of publishing the job on job boards.
Below are the steps to follow publishing the job on job boards.
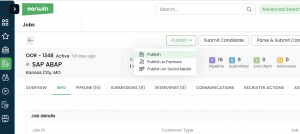
- Login to your Oorwin account and Go to Jobs module on the left menu under the recruitment section.
- Select the job > Click on Publish button > Click on Publish on job boards
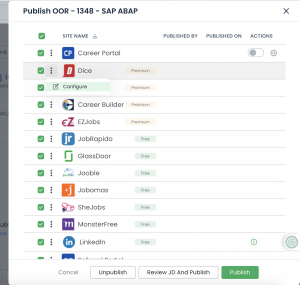
- Select the career portal and the job boards from the list which would like to publish To.
- Fill the mandatory fields of respective job boards by clicking on Actions > Configure.
- Finally, click on Publish, the job will be published on all selected job boards and will start receiving the applications.
Note: The user should be allocated with the credits by the account admin
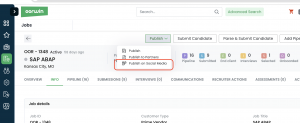
This article will guide you through the process of publishing the job on social media.
Below are the steps to follow publishing the job on social media.
- Login to your Oorwin account and Go to Jobs module on the left menu under the recruitment section.
- Open the job > Click on Publish button > Click on Publish on Social media.
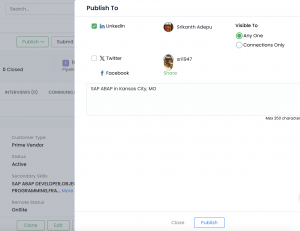
- Choose the platforms which would like to publish To.
- Enter the comments(If required) and click on publish.
You can rehire an off boarded employee through the onboarding process and you can also request all the documents needed from the employee again
Below are the steps to follow to Re-Hire an off boarded employee
- Log in to your Oorwin Account and navigate to off boarding module from the left menu under Human Resources Section
- You will find all the sections on the left menu based on the off boarding status and shows the employees list based on that status
- Select the employee that you wanted to re-hire from the off boarding completed list
- Click on three dots for the specific employee that you wanted to Re-Hire
- Click on “Re-Hire” option from the drop down list and click Yes on the confirmation box
- Now the employee record will be opened in a new tab with all the pre filled details and user can update the existing details if there are any changes
- User select the onboarding workflow from the drop down list and initiate the on boarding process as a re hire

You can send an email to the account contact through Oorwin portal by following below steps
- Log in to your Oorwin Account and navigate to Accounts module from the left menu under General Section
- Click on any account name to whom you want to send an email to the contact
- Click on Compose Email button on the top right corner
- You can select the pre defined email templates or enter your own content in the email body
- Enter any additional recipients in the CC field and add Subject on your own
- You can add attachments also from the select attachements section
- User can also use the mail merge option to replace with the name of the receiver in the mail body
- Once you are done with all the content then click on Send button to send the email to your receivers

You can verify all the timesheet external approvers at one place based on the tagged account and also you can verify which approver was tagged to which assignment
To view this list you need to have timesheet admin access which can be enabled from the settings->Role security
- Log in to your Oorwin Account and navigate to Timesheets module from the left menu under Human Resources Section
- You will find all the sections on the left menu and click on Timesheet settings on the top
- You will find a section called External Approvers on the left views and click on it
- This shows all the timesheet external approvers which are linked to the specific accounts
- User can also verify the assignments associated with the external approver by clicking on three dots->view linked assignments
- User can also create new external approver from here by clicking on “Create External Approver” button on the top right corner
The Profile Update Request feature allows recruiters to email candidates, asking for updated details. Candidates can fill in the requested information and send it back to the recruiter. Once the recruiter receives the information, they can review and approve it. After approval, the candidate’s records will be updated with the new details.
Below are the steps to follow on profile update request to candidate’s.
- Login to your Ooriwn account and Go to Candidate module on the left menu under the recruitment section.
- Select candidate > Actions > Click on Profile update request
- Select the required fields and mark star option to fill mandatory > Send.
- The candidate will receive the update details link email, the candidate has to fill the required details on the form and submit.
- Once the candidate submits the request, the recruiter will get a confirmation email or can directly access in approvals.
- Under Approvals > Submitted > review the candidate submitted details and click on Approve to save the record in candidate module.

