How to Add a Job in Oorwin?
Adding a job record is one of the most critical tasks for recruiters. So, it is of utmost importance for an ATS to offer easy-to-use options to add jobs with the details required. Oorwin’s ATS provides the following options to add jobs:
- Manual Add Job option
- Quick Add Job option
Manual Add Job Option
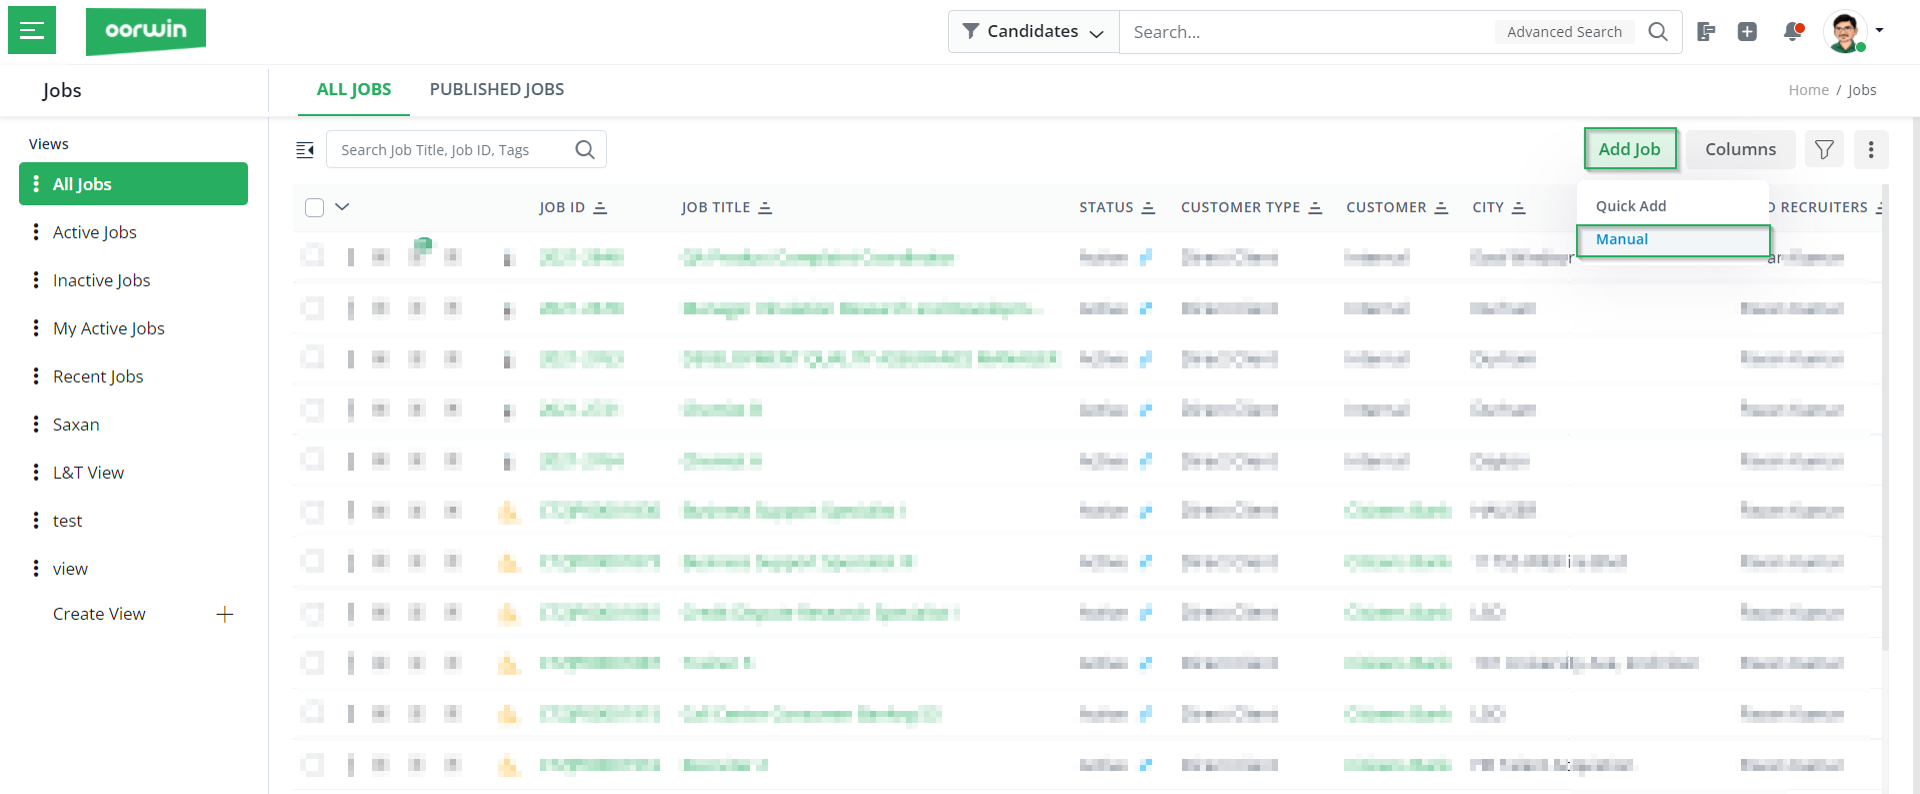
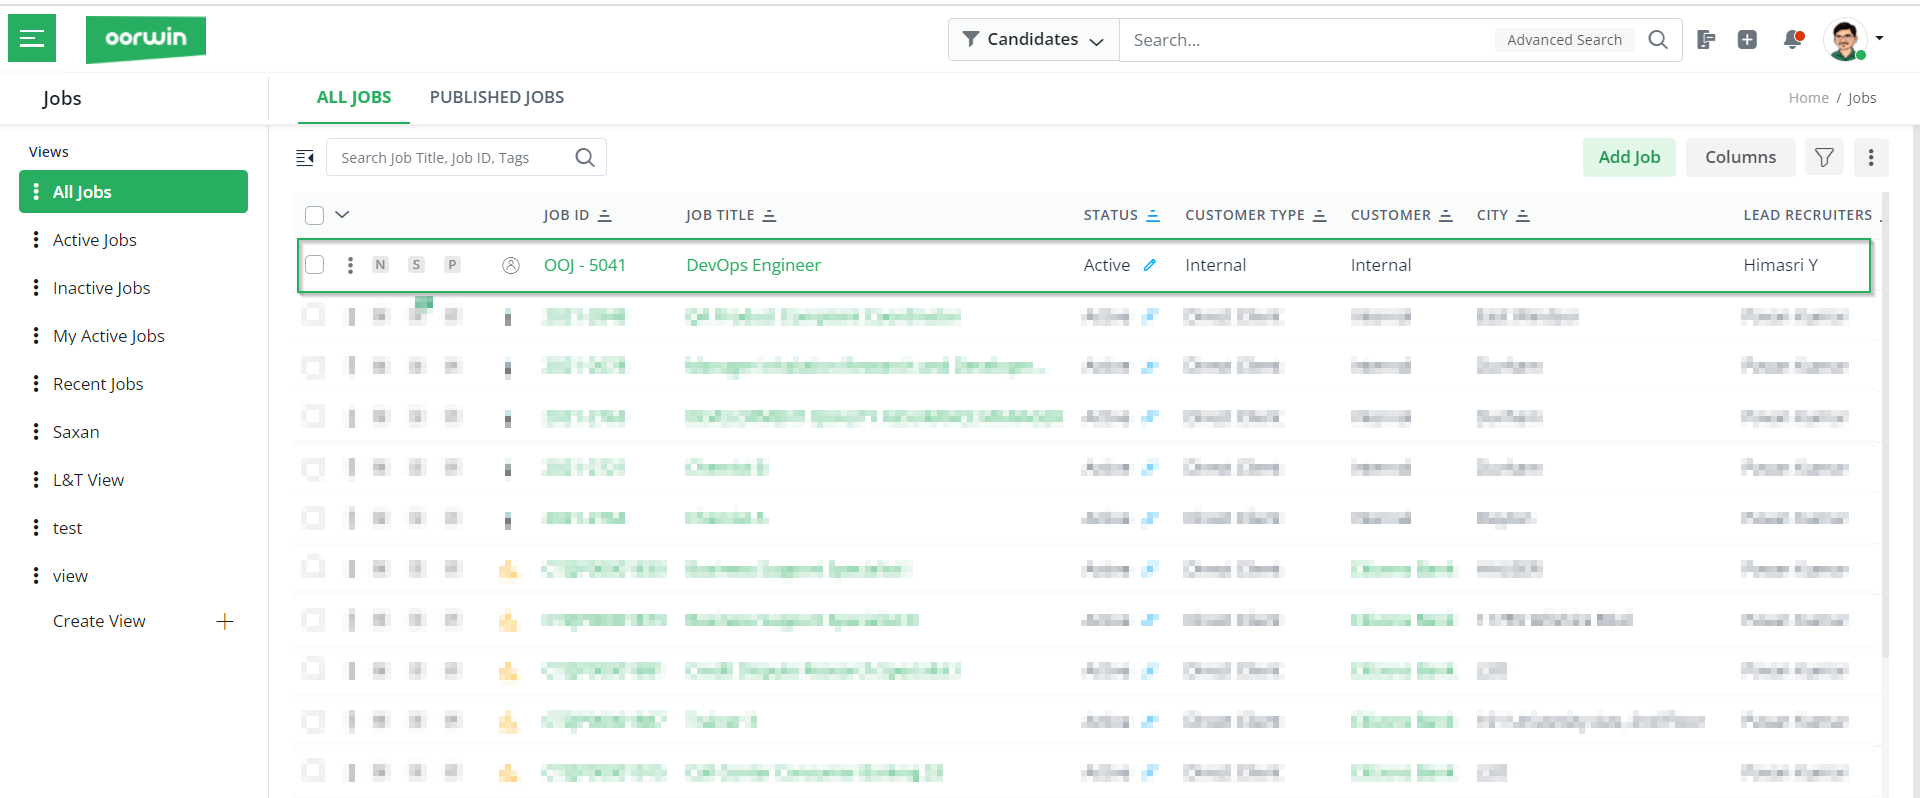
To add a job, you have to open your left menu and click on Jobs. You will be redirected to the following screen:
- Then, click on the Add Job option on the right-hand side and choose Manual.
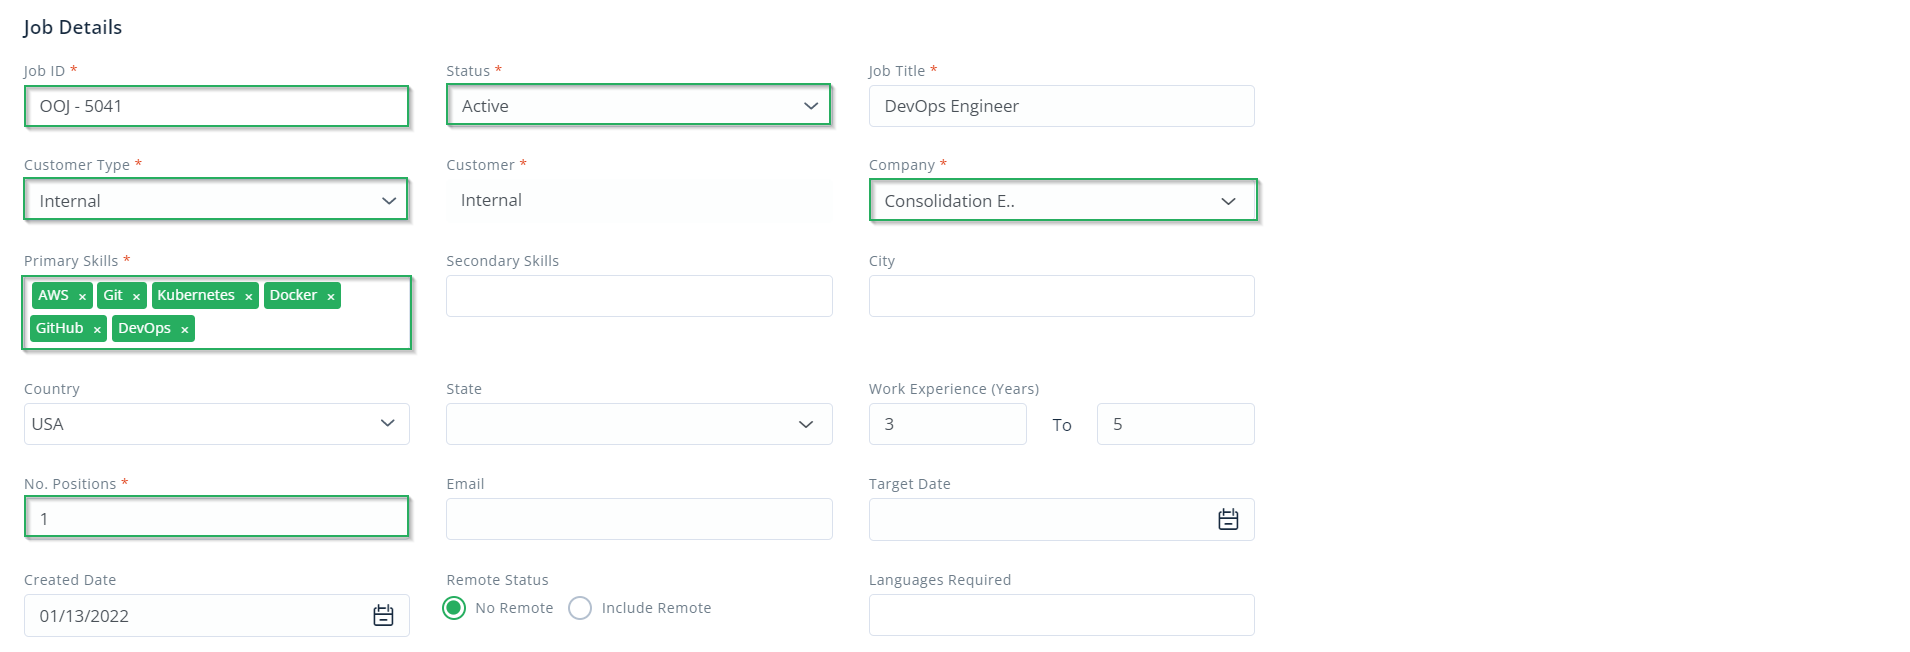
- In the following screen, add all the mandatory job details status, job title, customer type, company, number of positions.
- Next, add the payment and billing details such as the payment type, pay rate, etc.

- Now, mention the recruitment team, such as the client’s contact name.

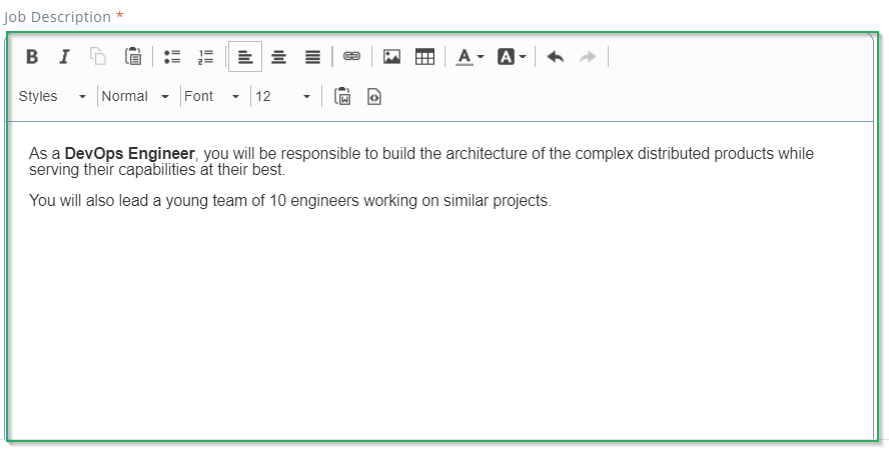
- Moving further, add the job description and format it.
- Finally, you can add the recruiter instructions and attach any required documents.

- Then, click on Save and Search to search candidates for this job. You can also click on Save if you wish to explore later.
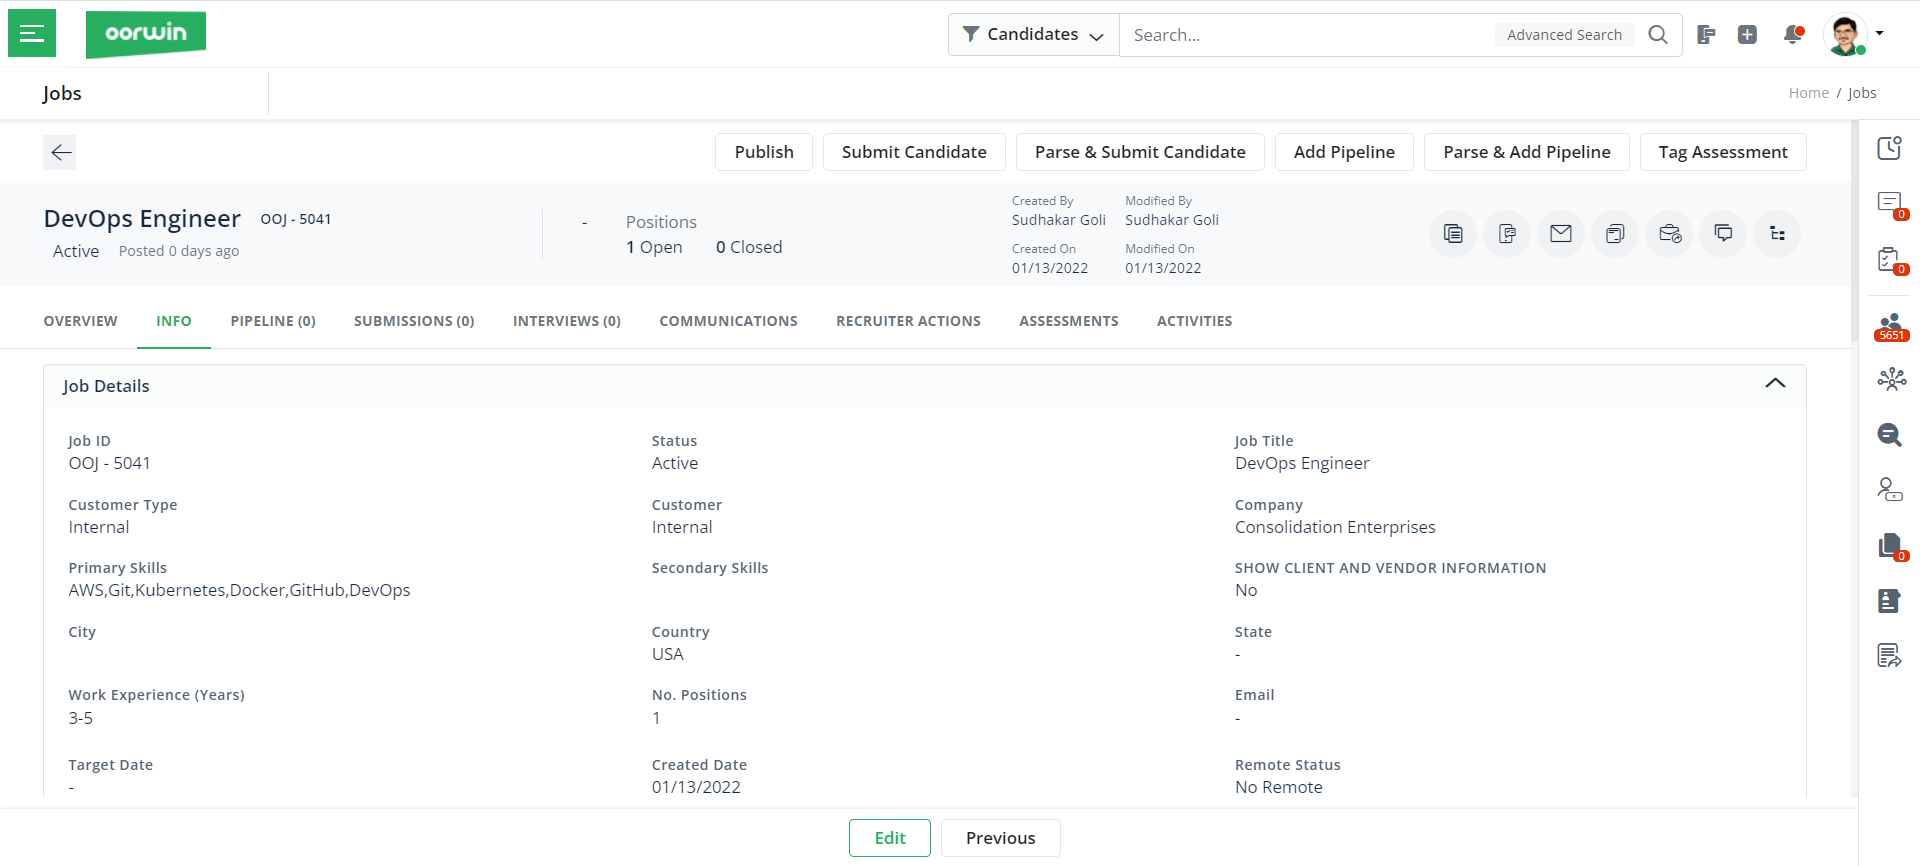
Once you click on Save, you will see the new job details as below:
Next in this article, let us understand how to use the Quick Add Jobs option to add new jobs in the Oorwin portal.
Quick Add Job Option
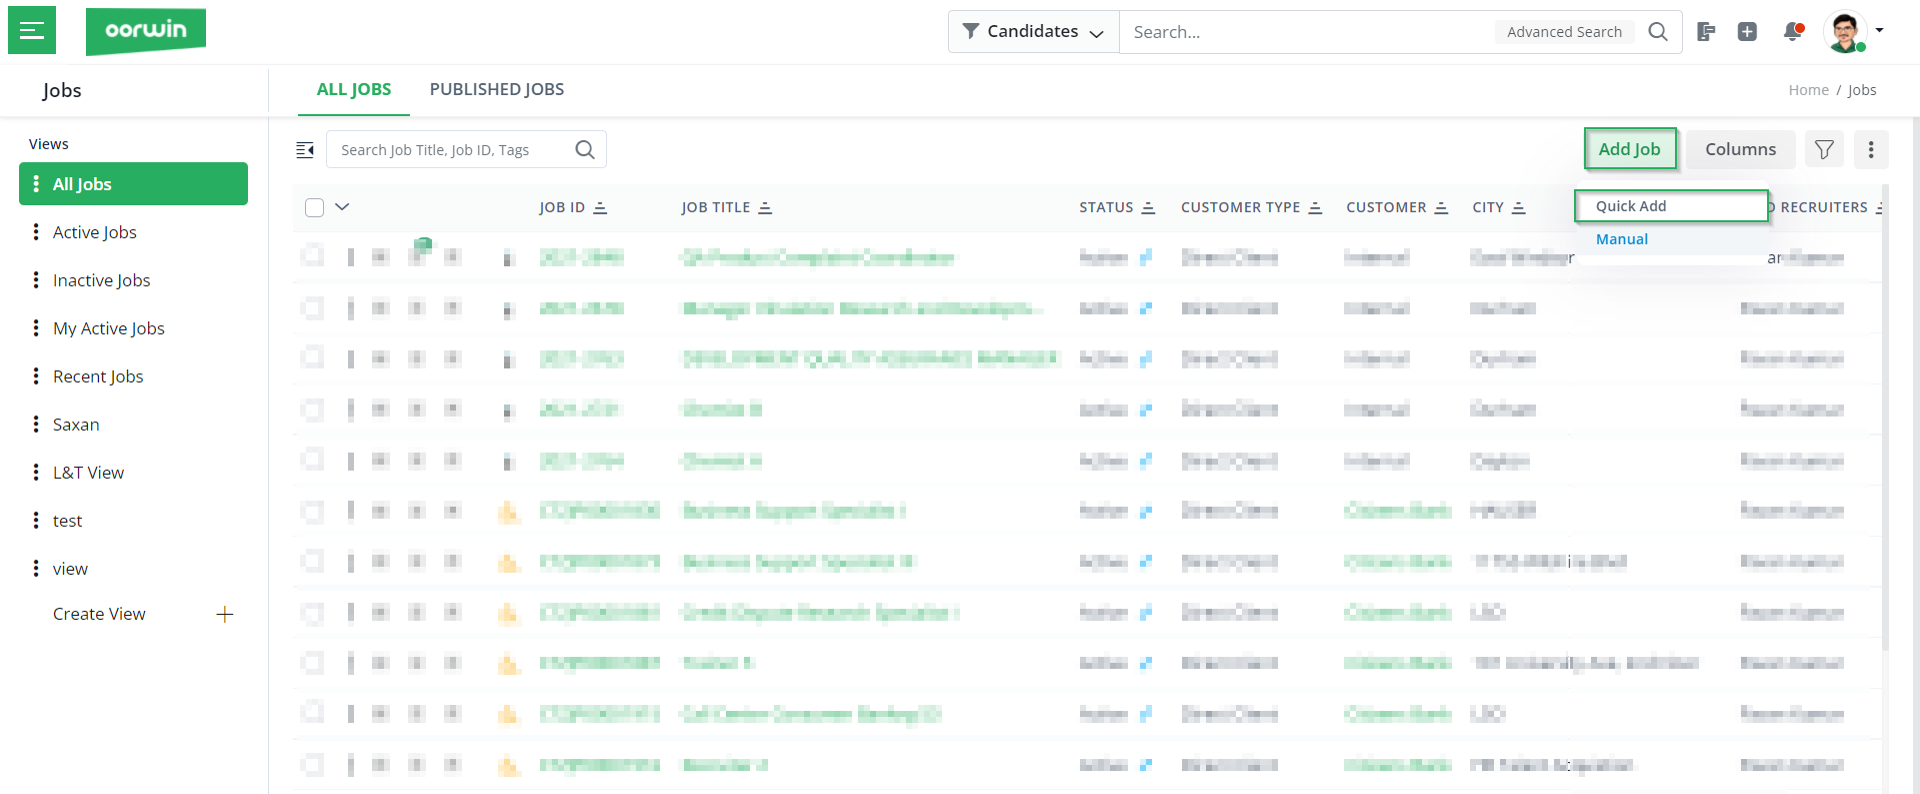
- To use the Quick Add Job option, you have to choose the Quick Add option from the jobs dashboard.
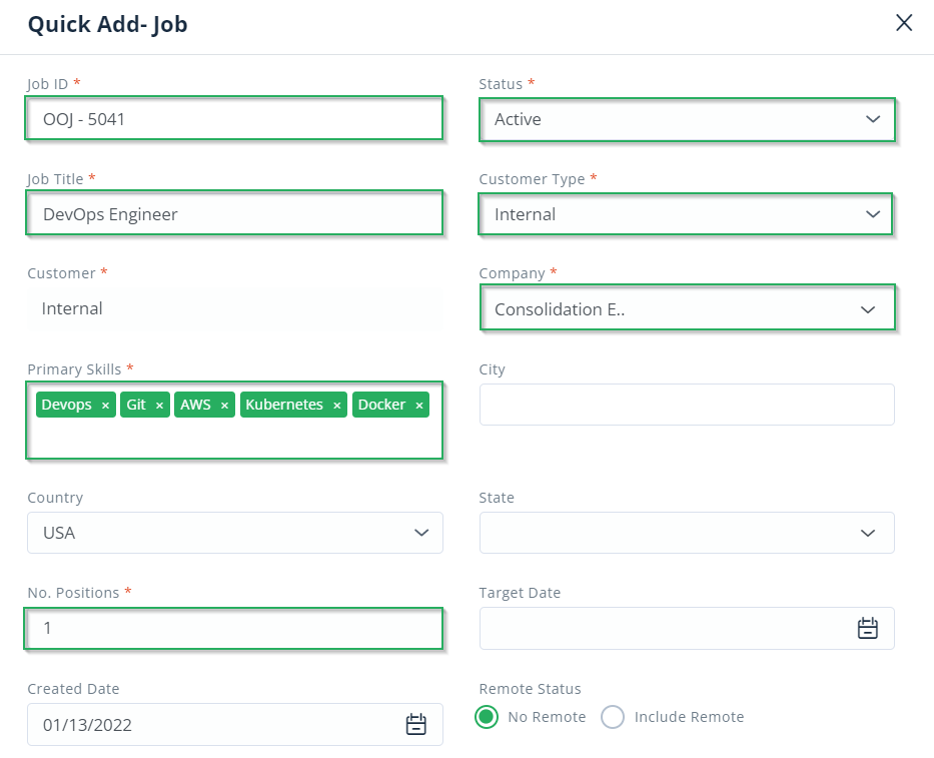
- In the following screen, enter the required job details: status, job title, customer type, customer name, company name, skills required, and the number of positions.
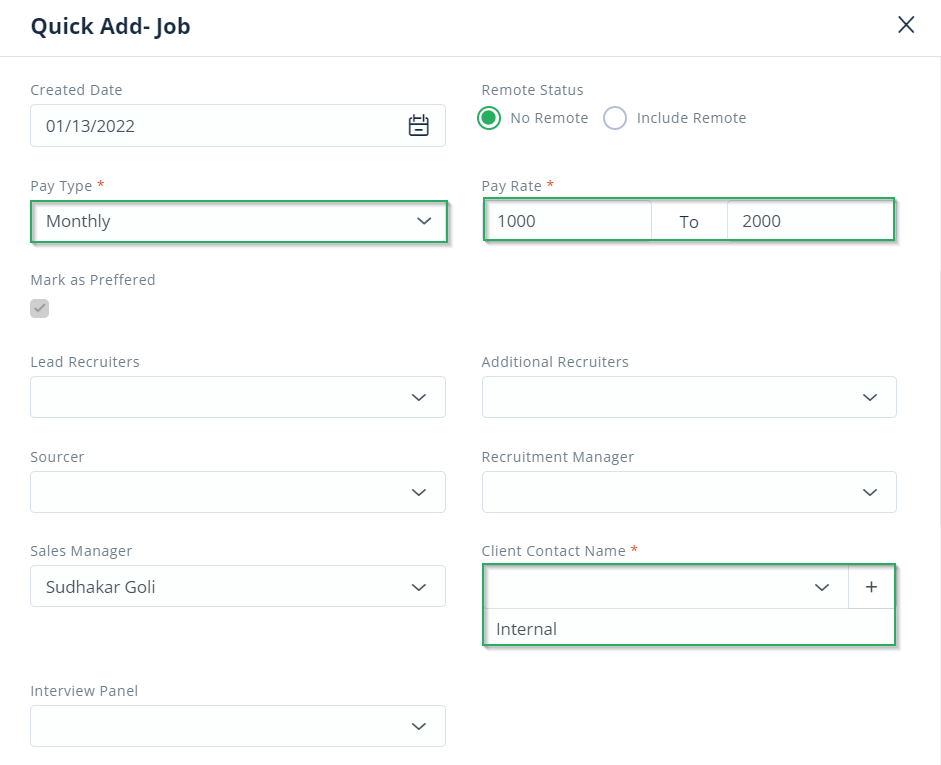
- Then enter the payment type, pay rate, and client contact name.
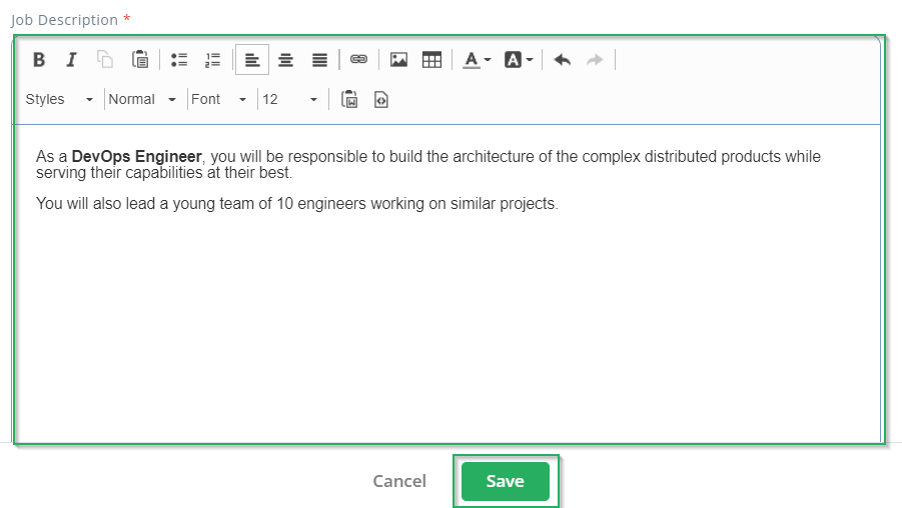
- Finally, enter the job description and click on Save.
Once you click on Save, you will see the new job added to the Jobs Dashboard.
With this, we come to an end to this article. If you are interested in knowing more about Oorwin’s products, take a product tour today or contact us at +91-8977801805 / USA: +1877-766-7946 to talk to our product advisors.
Get the latest Oorwin releases, updates, success stories & industry news
 Back
Back