Accounts in Oorwin
Accounts in Oorwin
Accounts in Oorwin represent the companies or the organizations you are currently dealing with. Accounts can be a variety of types such as clients, end clients, prospects, vendors, etc. In Oorwin’s portal, you can perform a variety of actions such as:
- Add an Account
- Merge Accounts
- Edit/ Archive Accounts
- View Details of Accounts
- Extra actions to customize accounts
- Customize columns view
- Export account list
- Upload a database of accounts
- Download accounts templates
- Oorwin Accounts Terminology
So, in this article on accounts in Oorwin, let us understand the various actions you can perform with accounts.
Add an Account
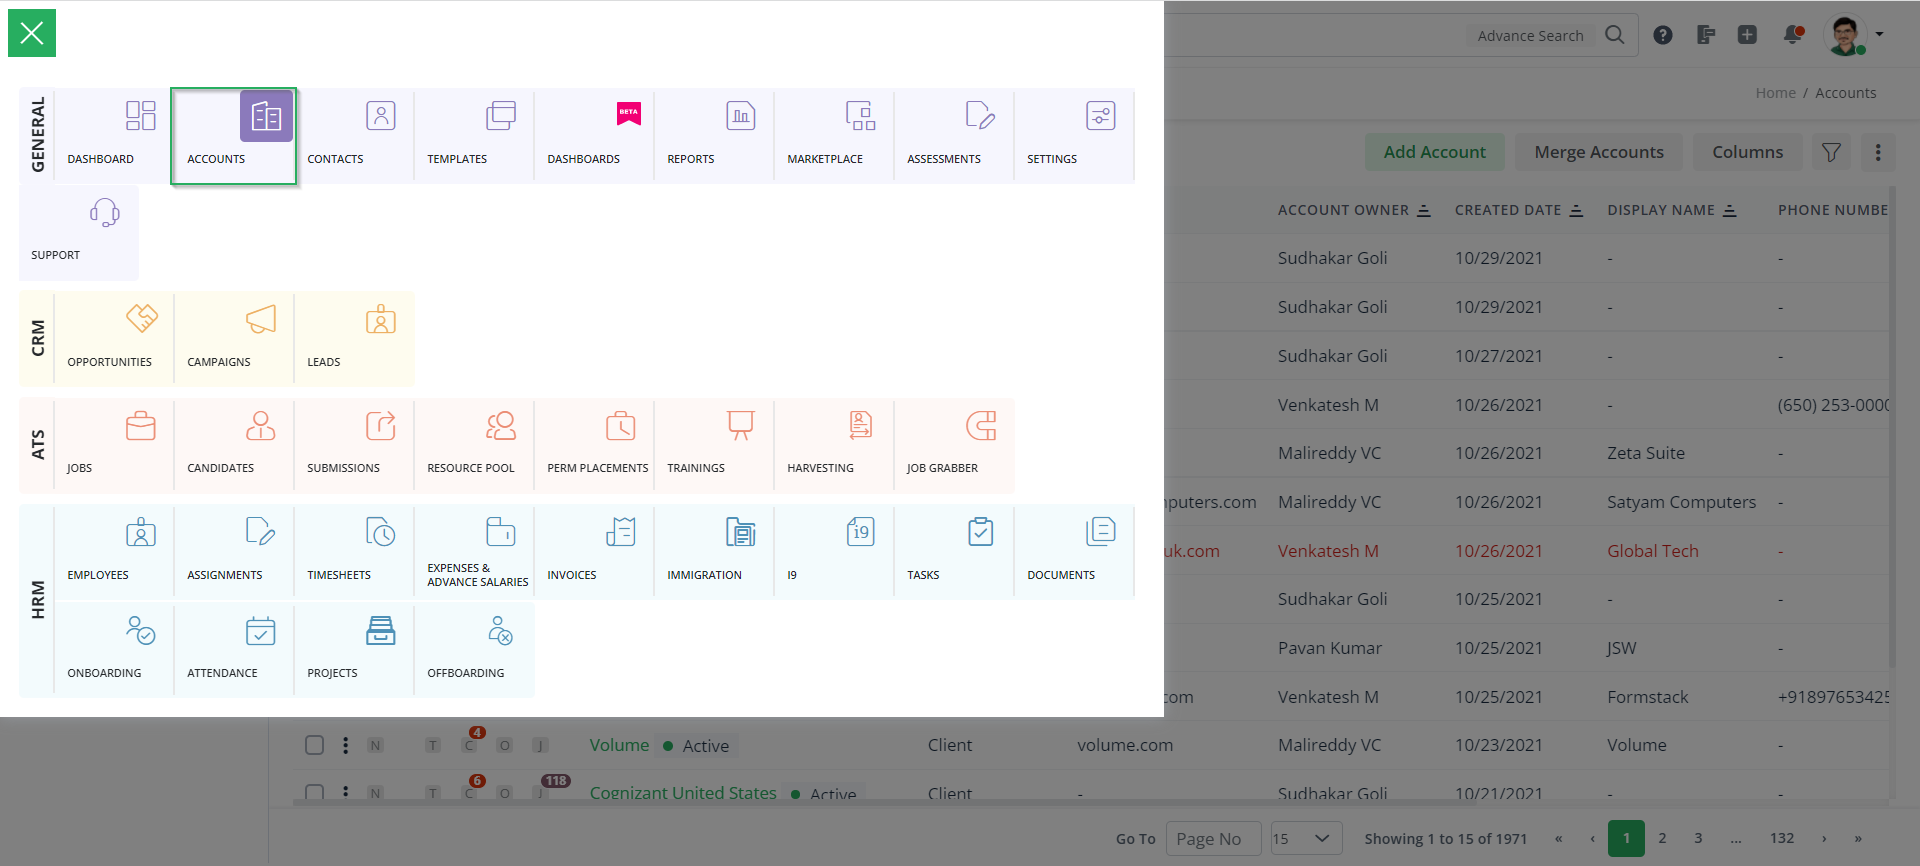
- To add a new account in Oorwin, you must log in to your Oorwin portal -> click on Accounts in the Menu dashboard.
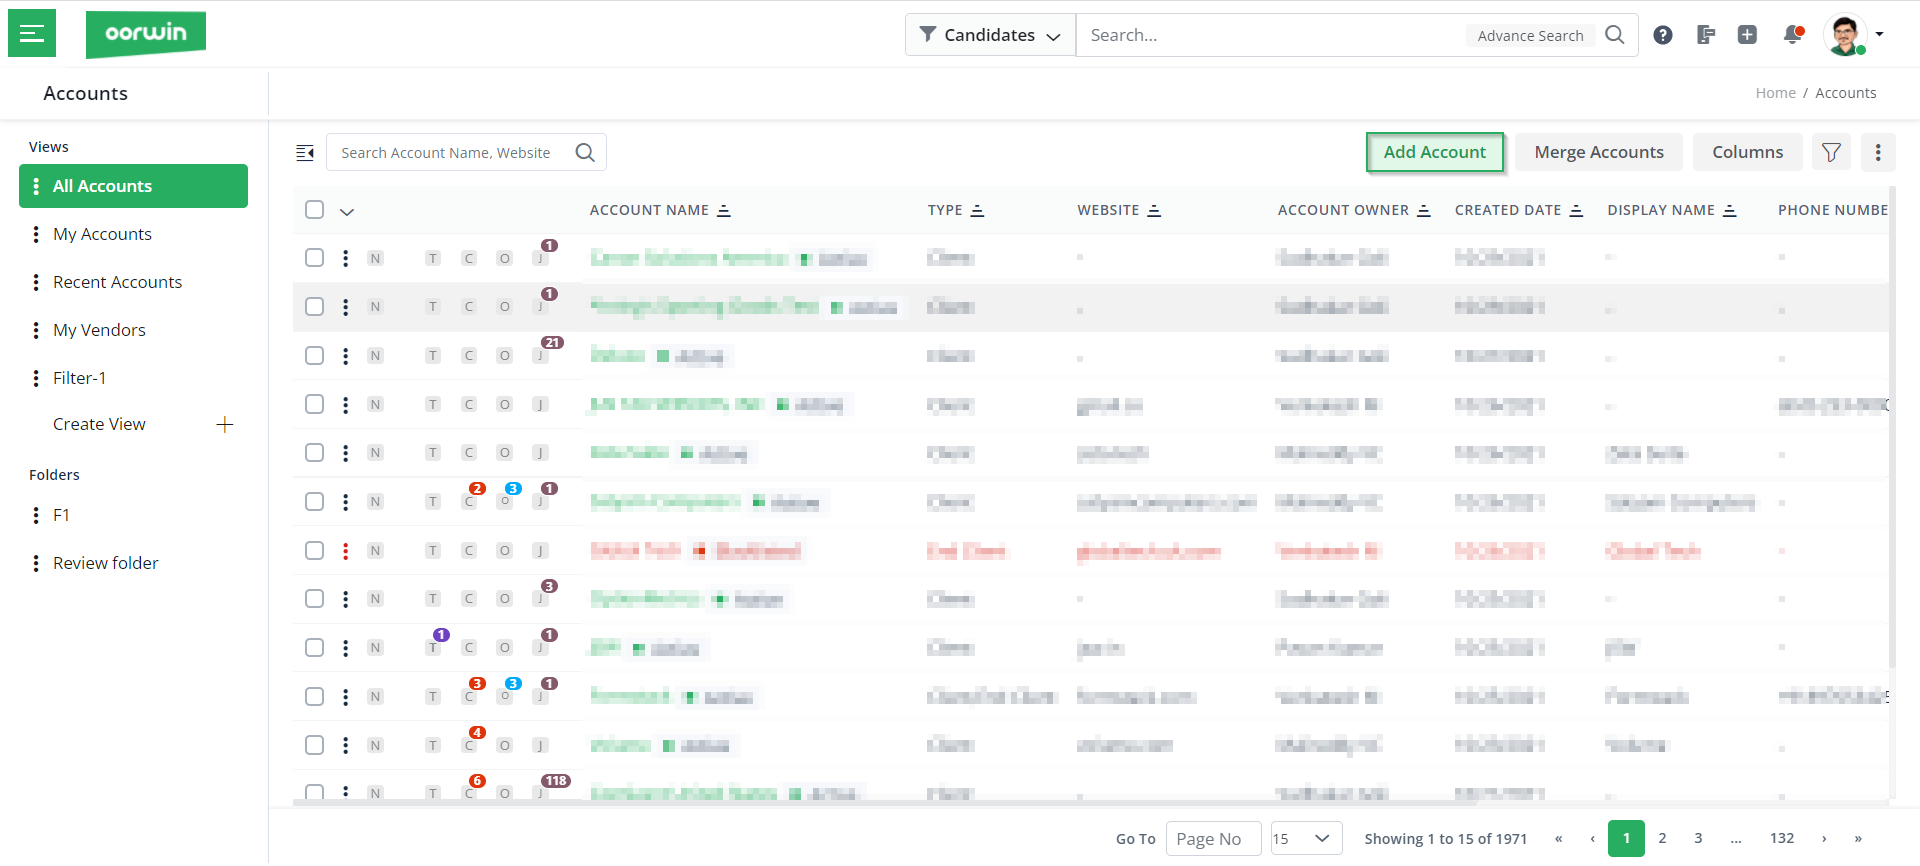
- Now, click on the Add Account button on the top right-hand side of the screen.
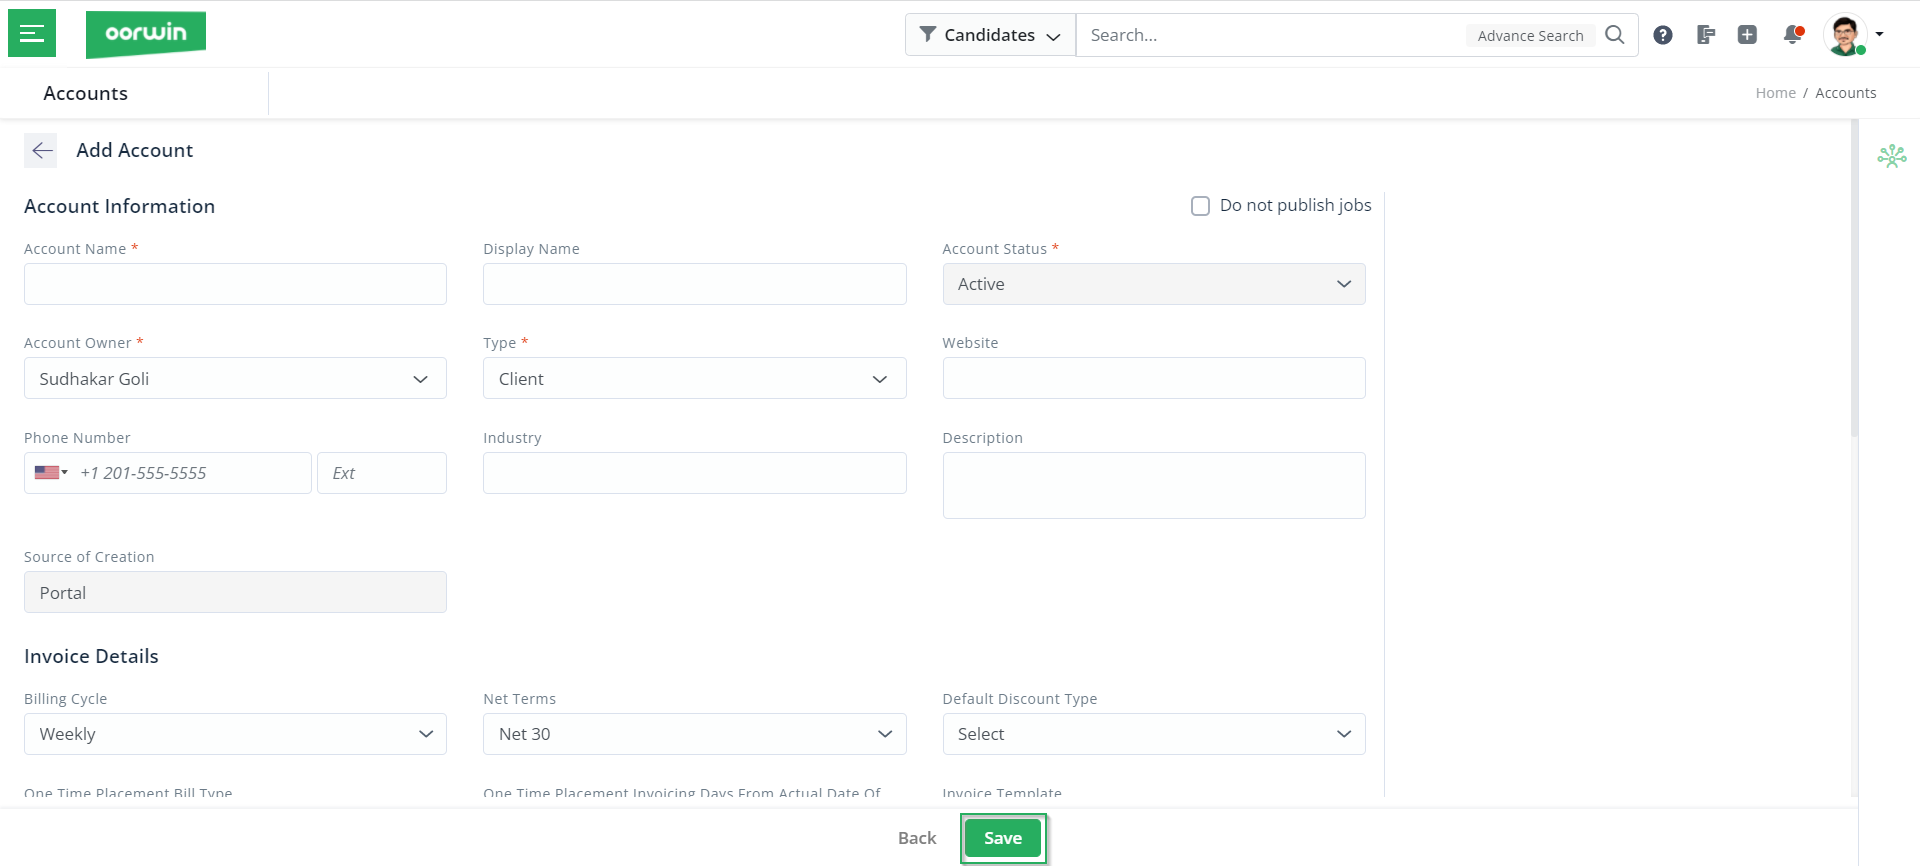
- You will be then redirected to the following screen, where you have to mention the details of the account such as account name, account owner, account status, account type, etc. Then, click on Save. Once you click on Save, you will see the account added to the list of accounts in your portal.
Next, in this article on accounts in Oorwin, let us look into how to merge multiple accounts.
Merge Accounts
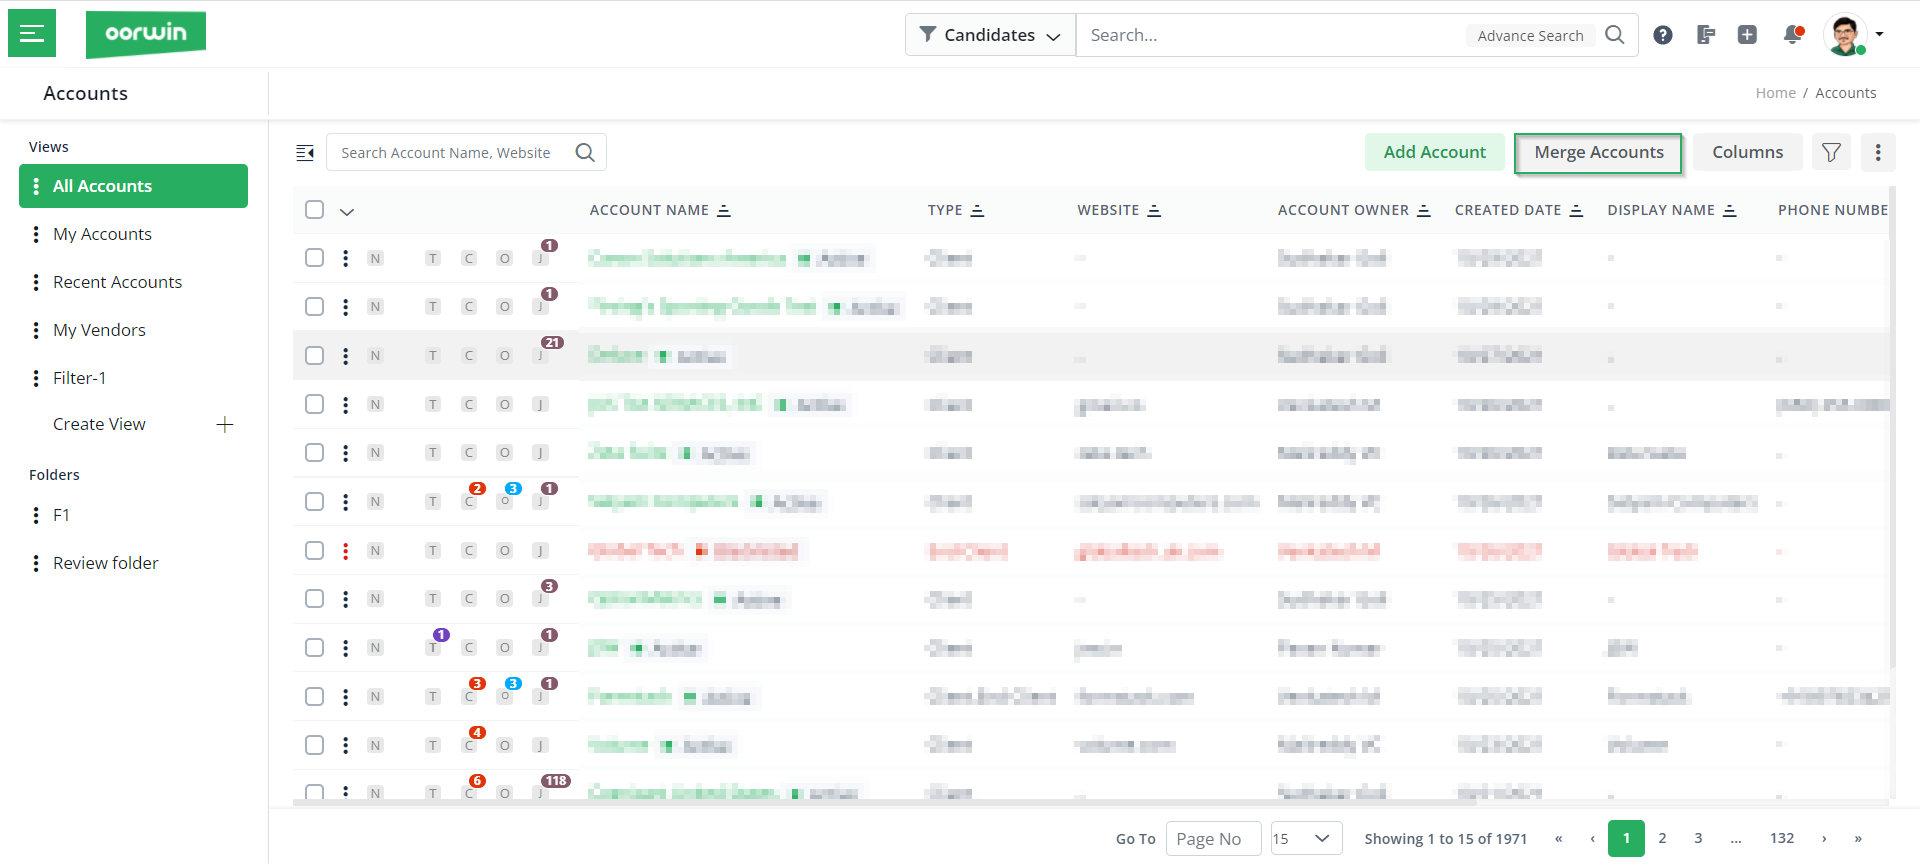
- To merge accounts in Oorwin, you must go to the Accounts dashboard and click on the Merge Accounts button.
- Now, choose a minimum of 2 Accounts required to merge, and then click on Next.
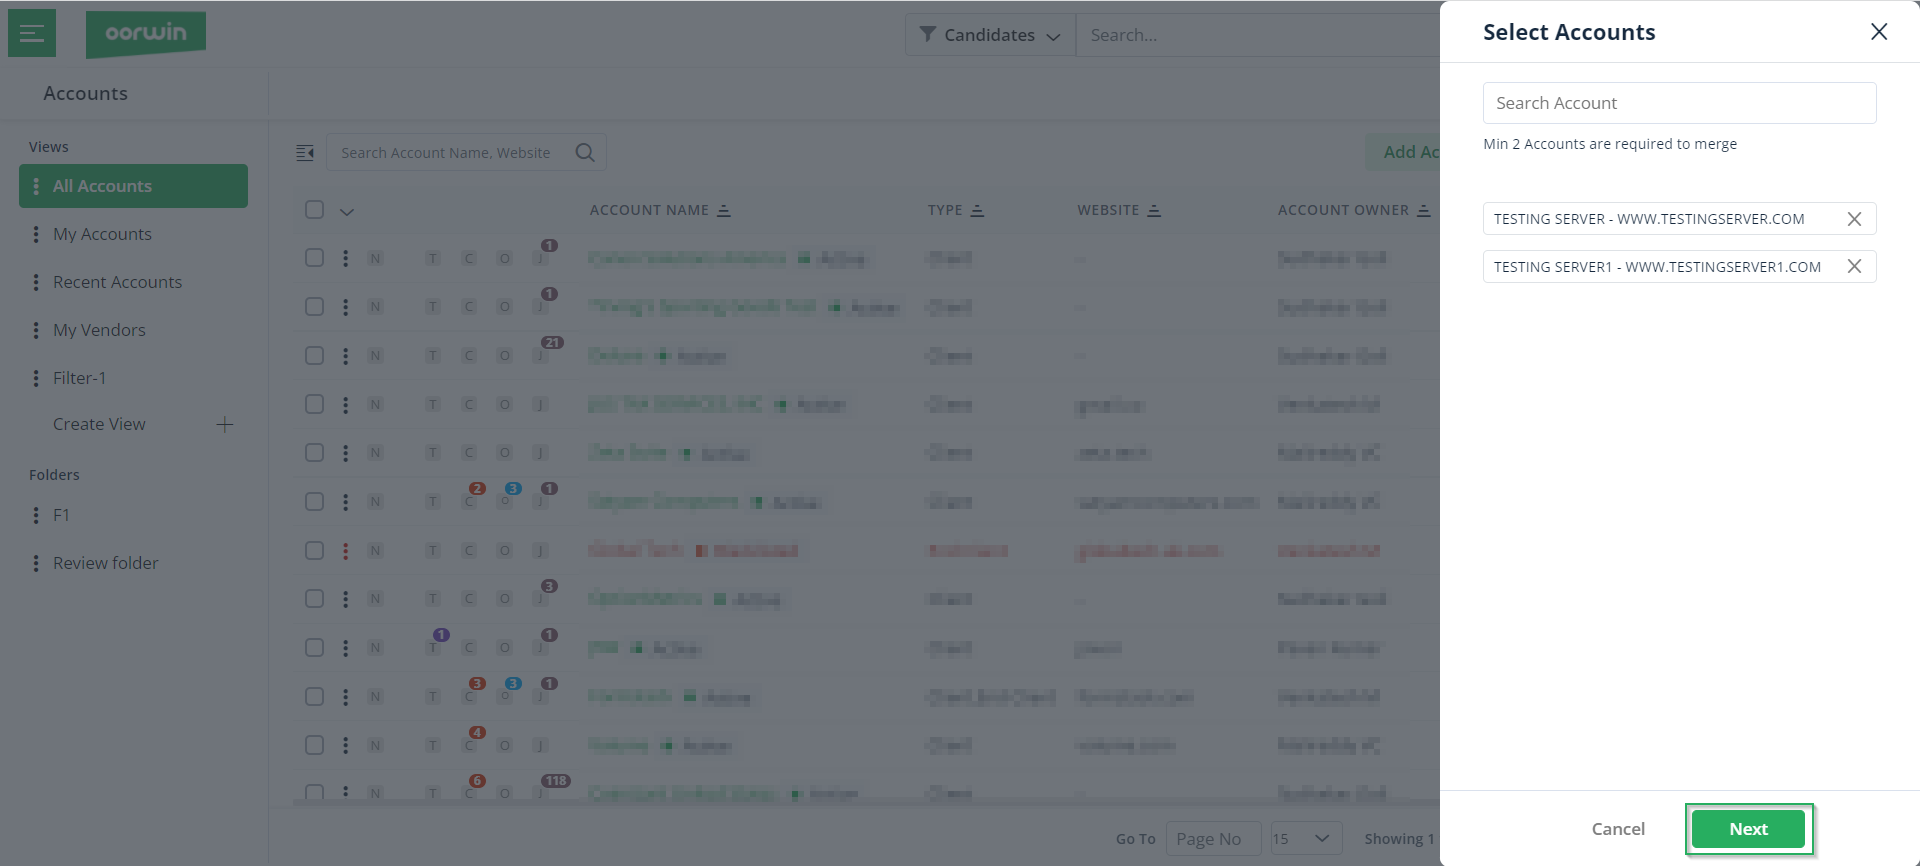
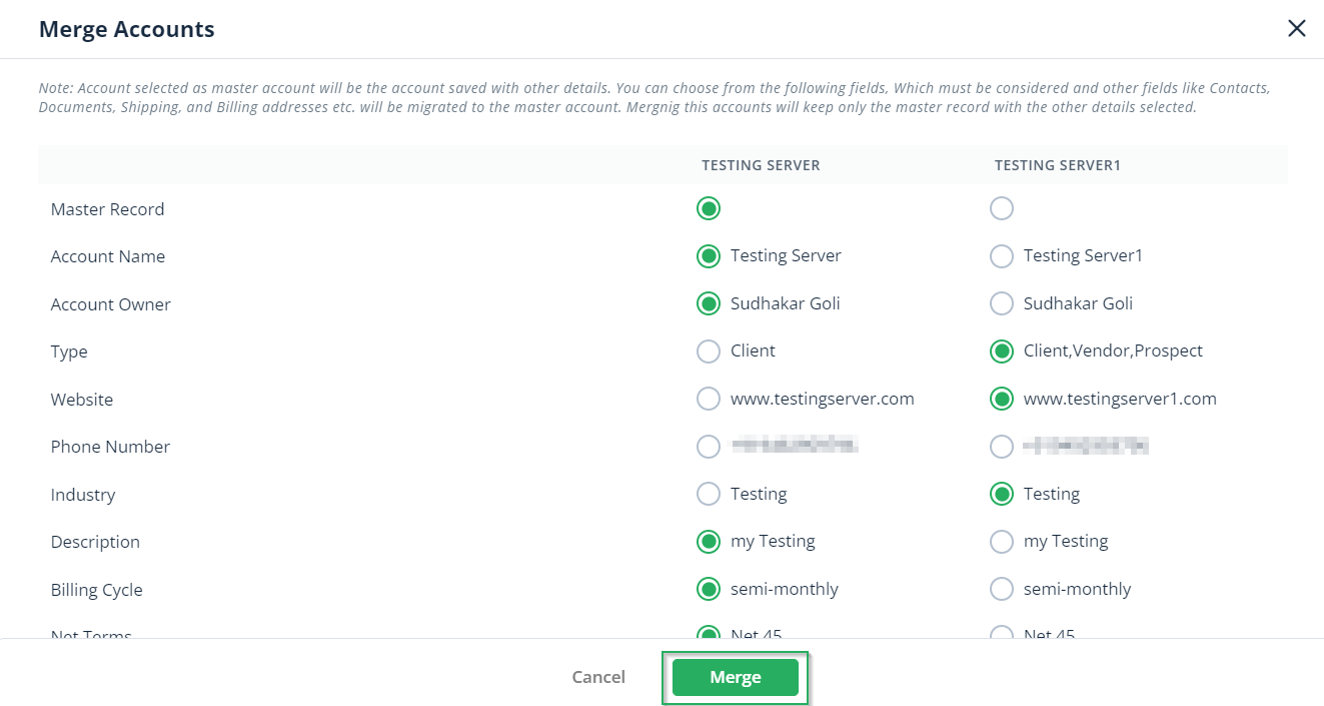
- Next, you have to choose an account as the master account. Here, please note that the account selected as the master account will be the account saved with other details.
Note: You can also choose from the following fields, that must be considered and should be migrated to the master account. So, basically merging these accounts will keep only the master record with the other details selected.
- Once you choose the fields and the master account, click on Merge.
Next, in this article on accounts in Oorwin, let us look into how to edit/archive accounts.
Edit/ Archive Accounts
- To edit or archive any account you just have to go to the accounts dashboard, and click on the 3 dots beside the account you wish to edit/ archive.
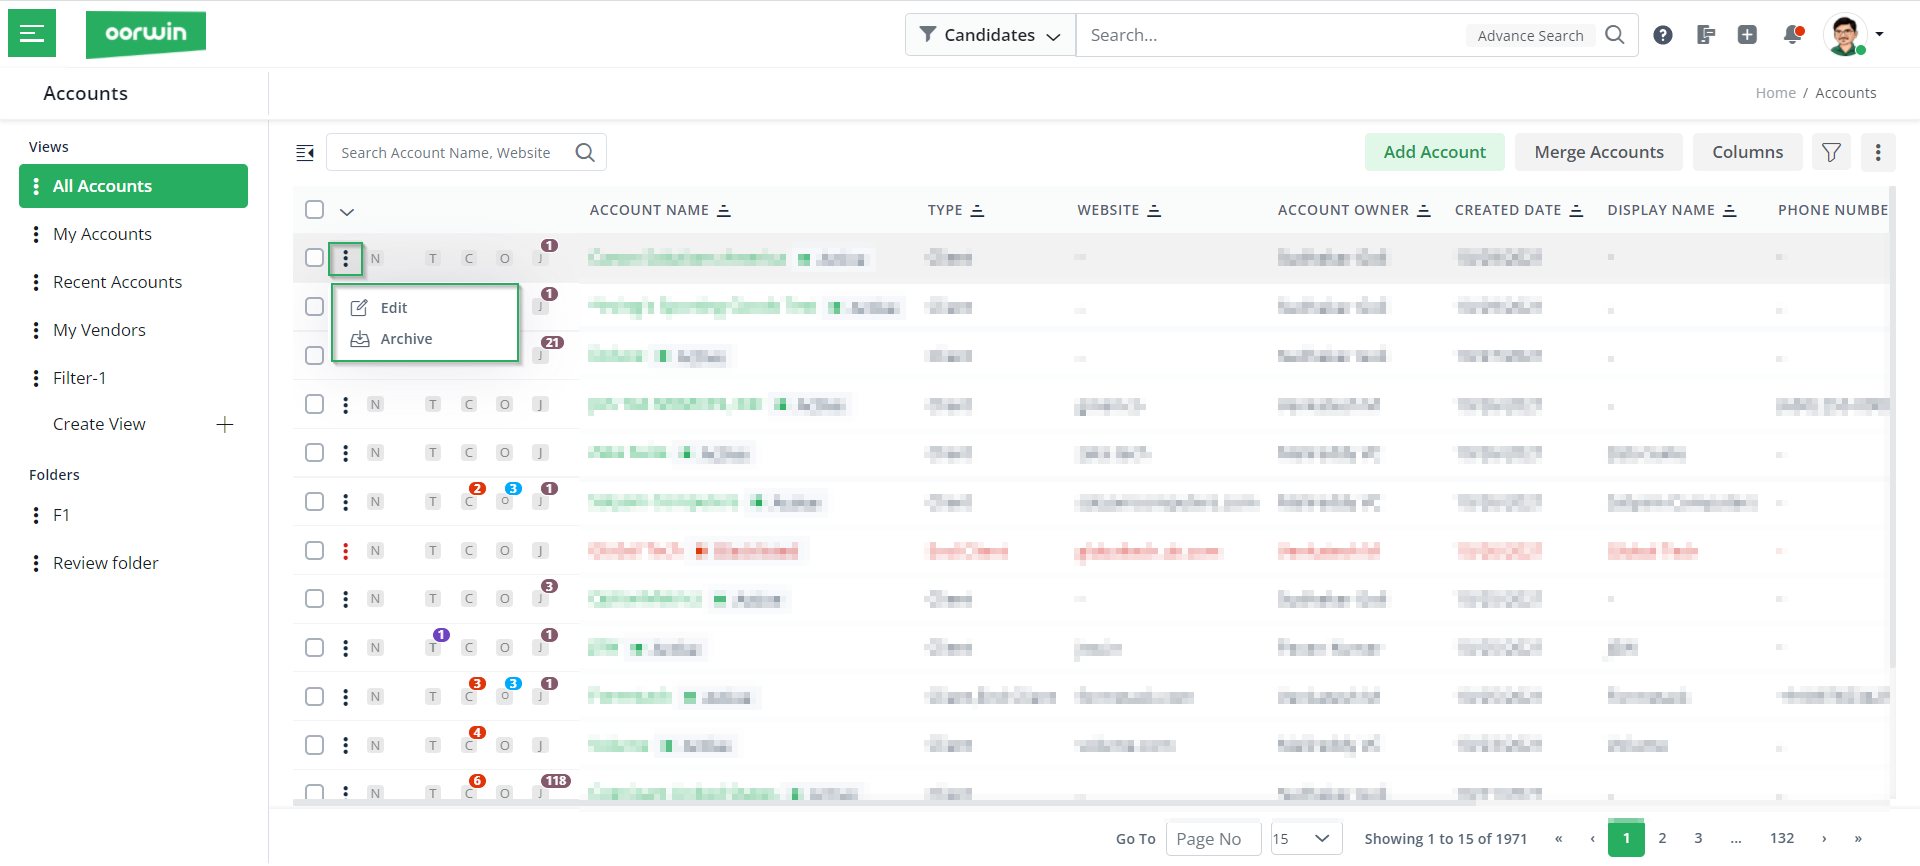
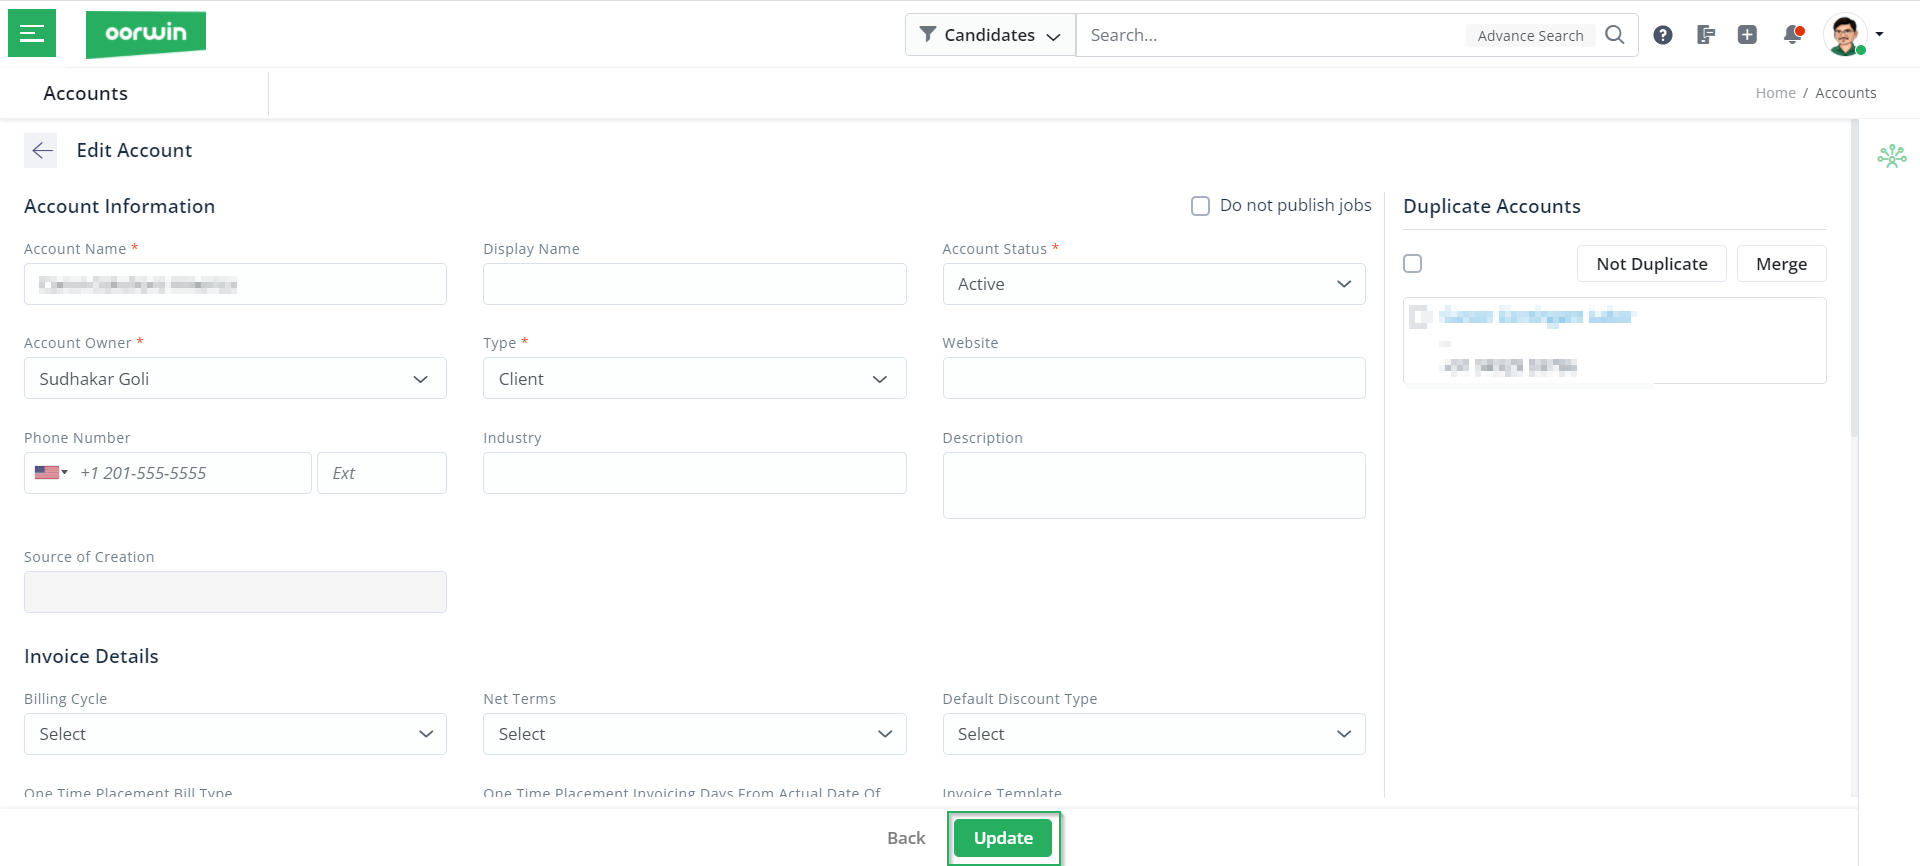
- Let us say if you wish to edit, you have to click on Edit on the above drop-down and you will be redirected to the following screen. Here, you can edit the account details and click on Update.
- Similarly, if you wish to archive an account, you have to click on Archive from the drop-down, as shown in step 1. Once you click on Archive, you will see the following alert, where you have to confirm by clicking on Yes.
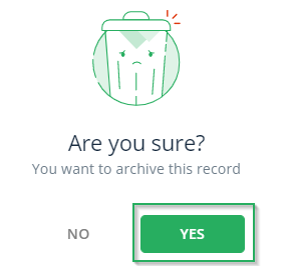
Post confirmation, you will observe the account archive. Moving ahead in this article, let us understand how to view the details of the account.
View Details of Accounts
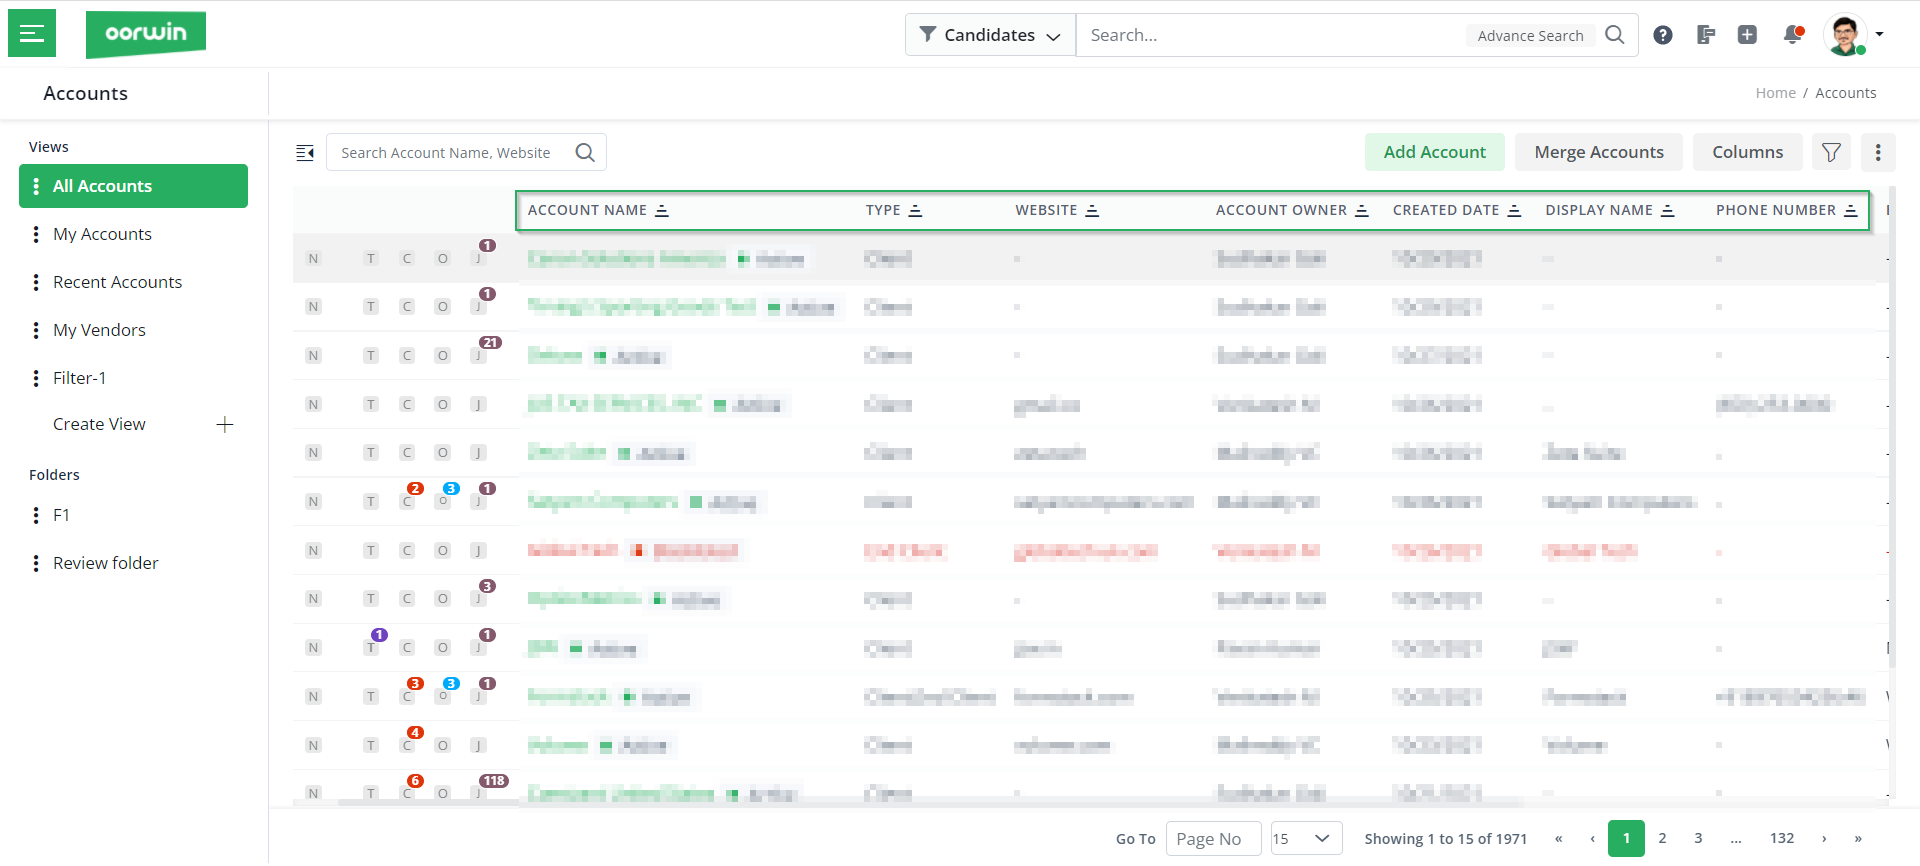
- You can view the basic details of any account by opening the accounts dashboard. Here, you will find various columns displaying the account details.
- To find the intricate details of any account such as notes, tasks, contacts, opportunities, and jobs, you can click on the options just beside the account name. Here, please note that you can always add new notes, tasks, contacts, opportunities, and jobs by clicking on the respective icons.

- An alternate way of viewing the account details is to just click on the account name. You will then be redirected to the detailed view of the account as follows.
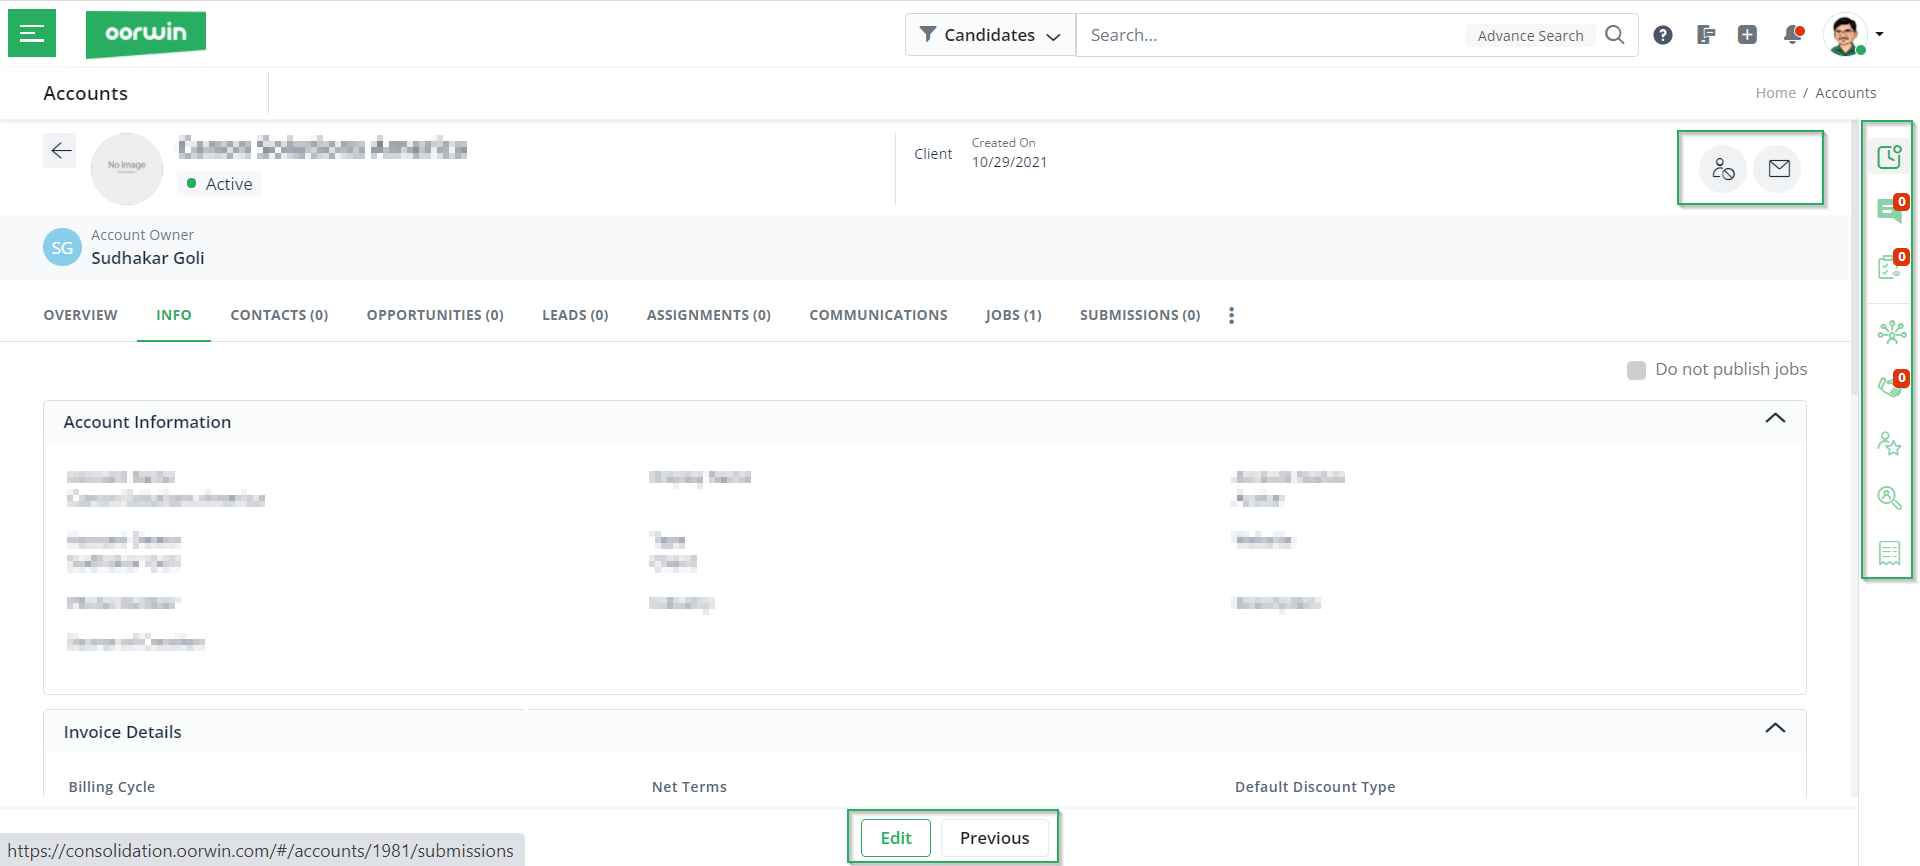
Note: In the above detailed view, you will also find options to blacklist the account, compose an email on the top right hand side. On the right hand side panel, you can view all the activities of the account, notes and tasks added, insights about the account, vendor candidates, primary contact details of the account, duplicate accounts, option to search contacts related to account and also invoice insights. At the bottom of the page, you will find an option to edit the account or go to the previous account.
Next, in this article on accounts in Oorwin, let us understand a few extra actions provided in the dashboard.
Extra actions to customize accounts
The following are a few of the extra actions provided in the Oorwin dashboard of accounts:
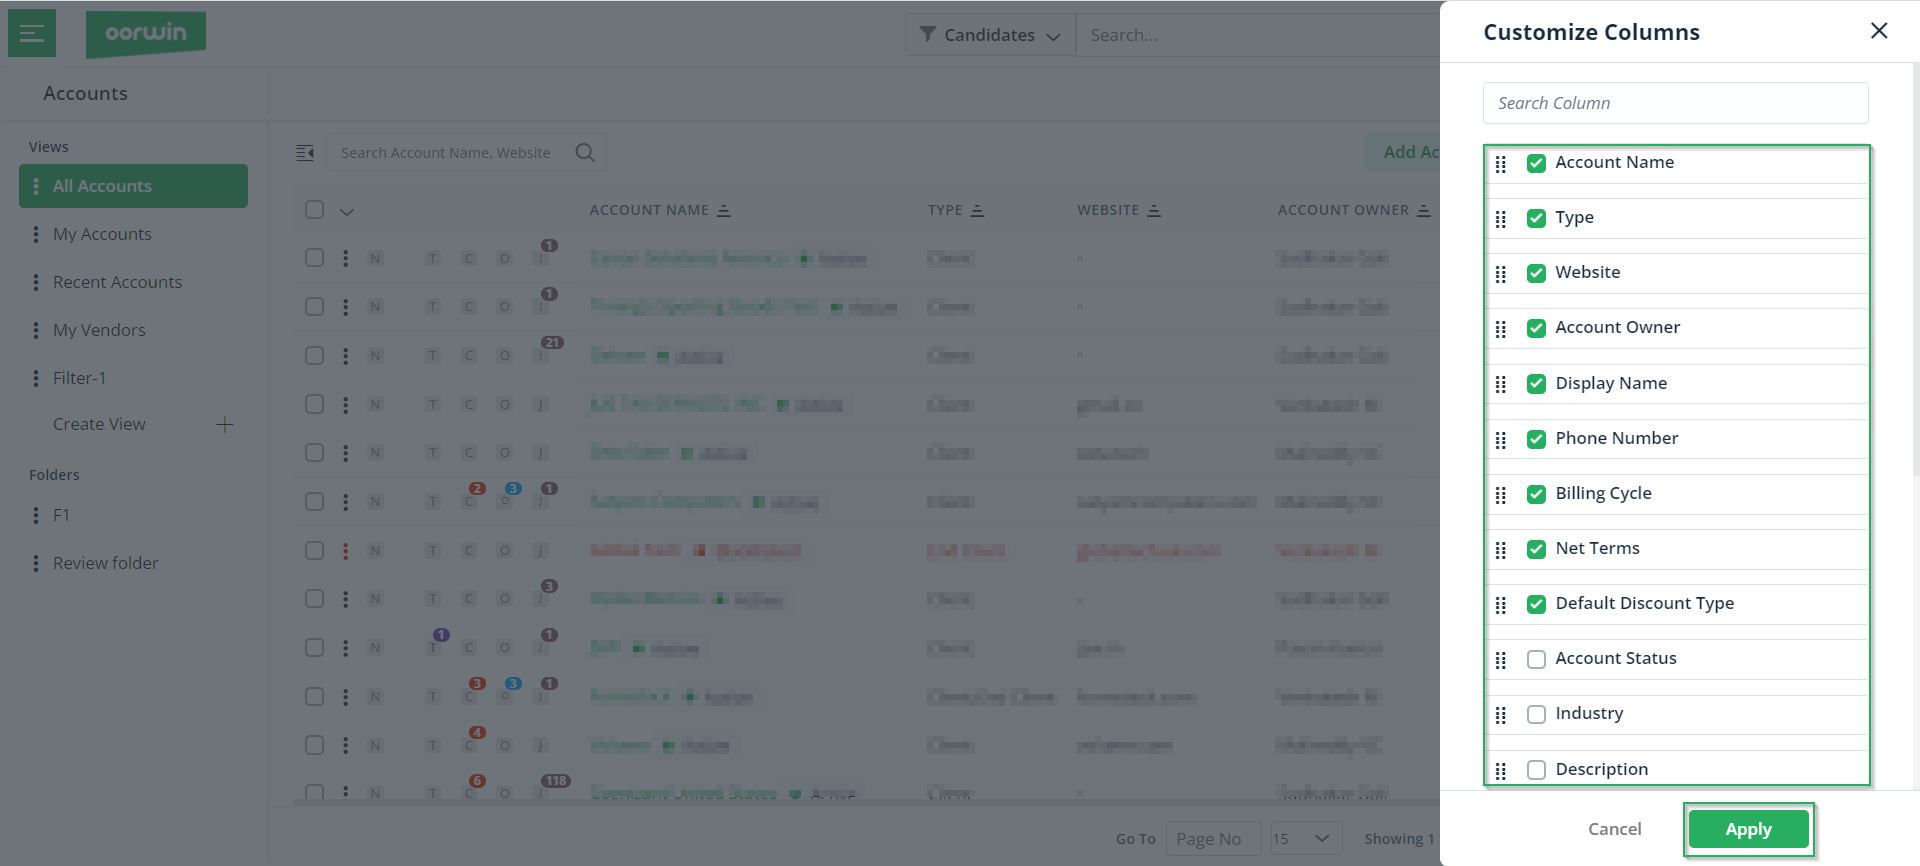
Customize columns view
- To customize the columns view, click on the Columns button, present on the top right-hand side.
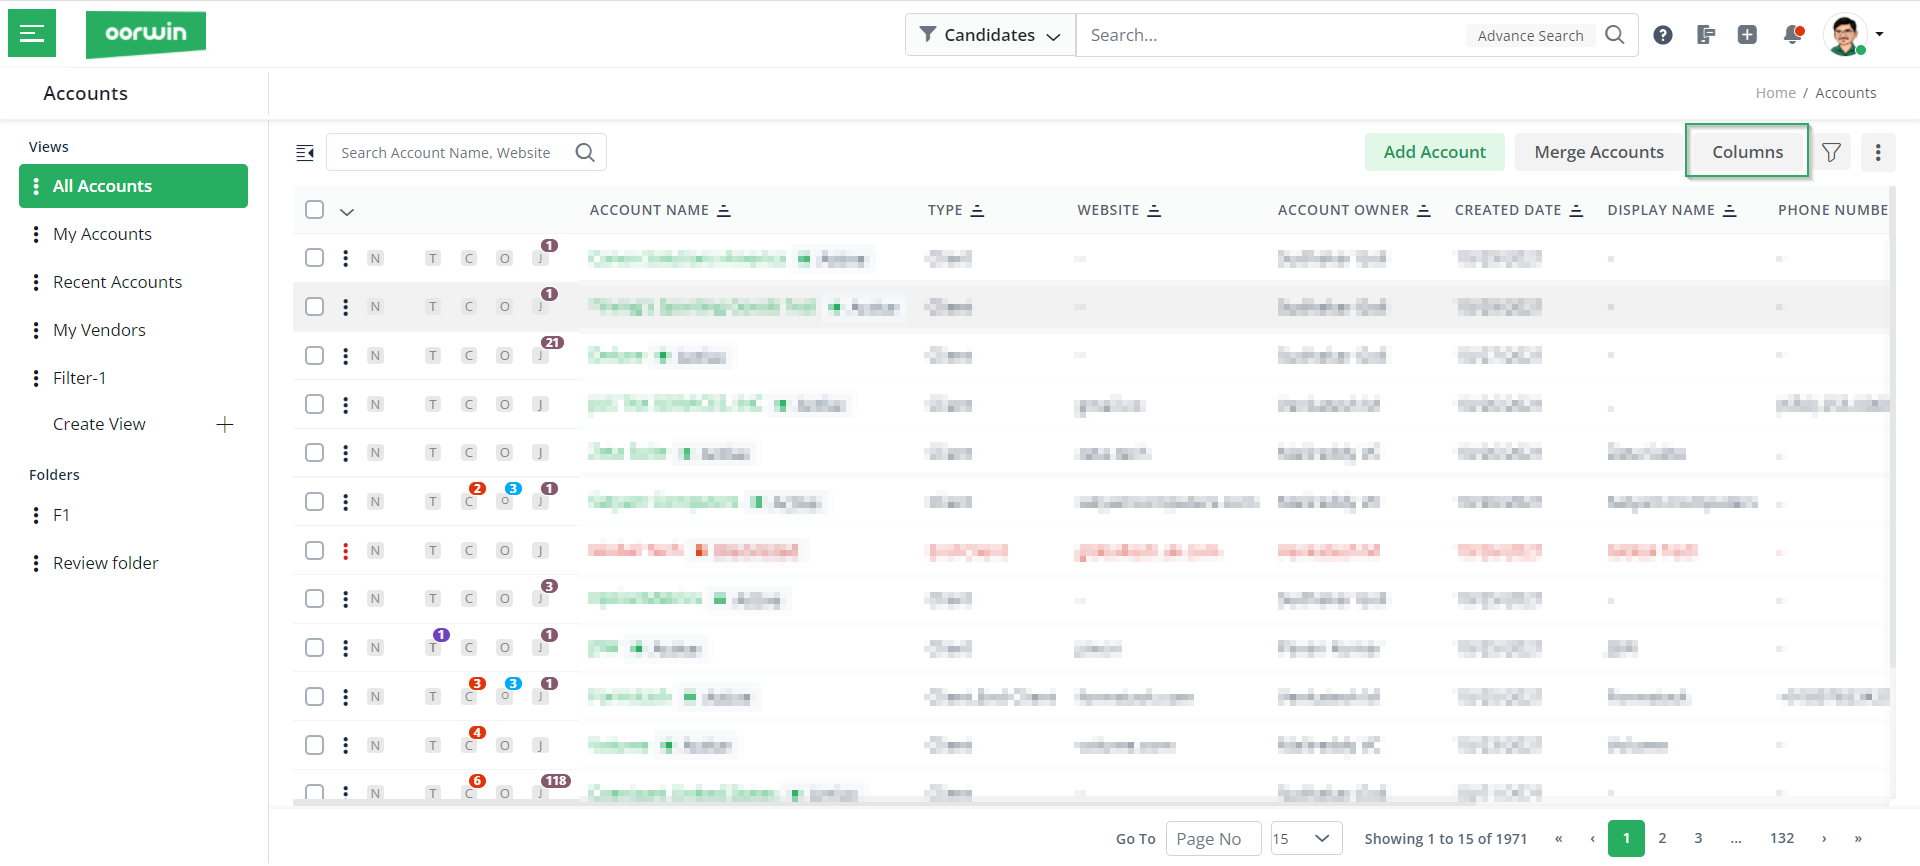
- Then, check the radio button for the columns you wish to include in the accounts view list. You can also select the display order of the columns by dragging and dropping the columns.
Export account list
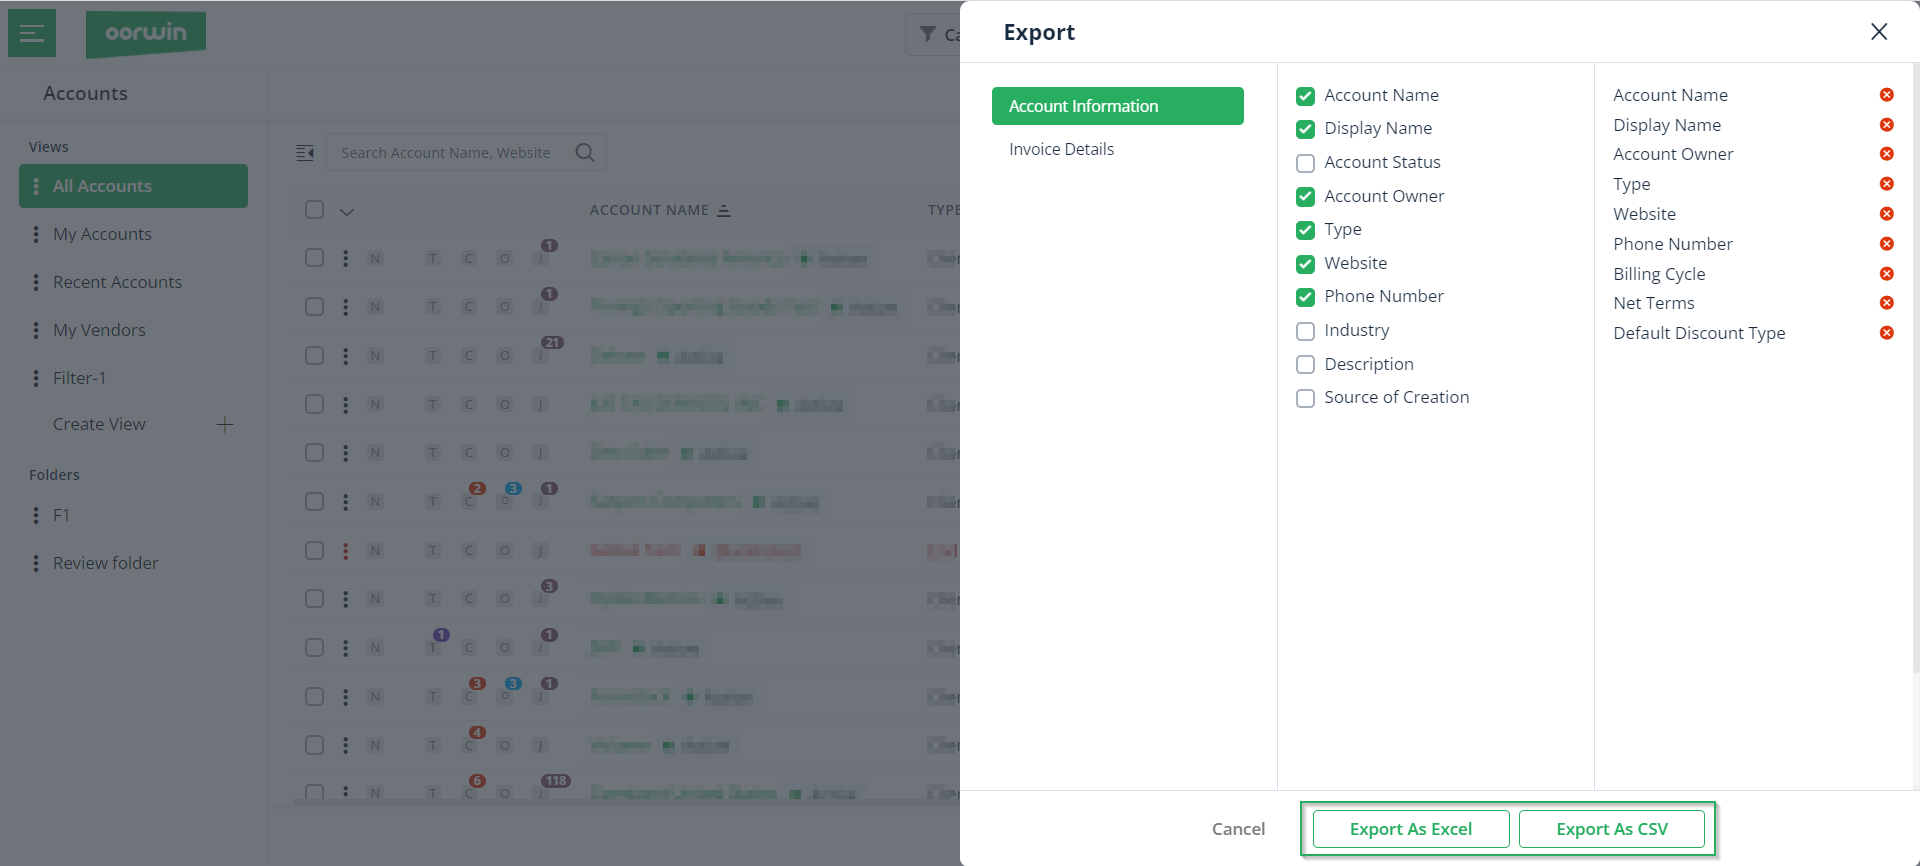
- To export the accounts list, click on the 3 dots on the top right-hand side, and click on Export.
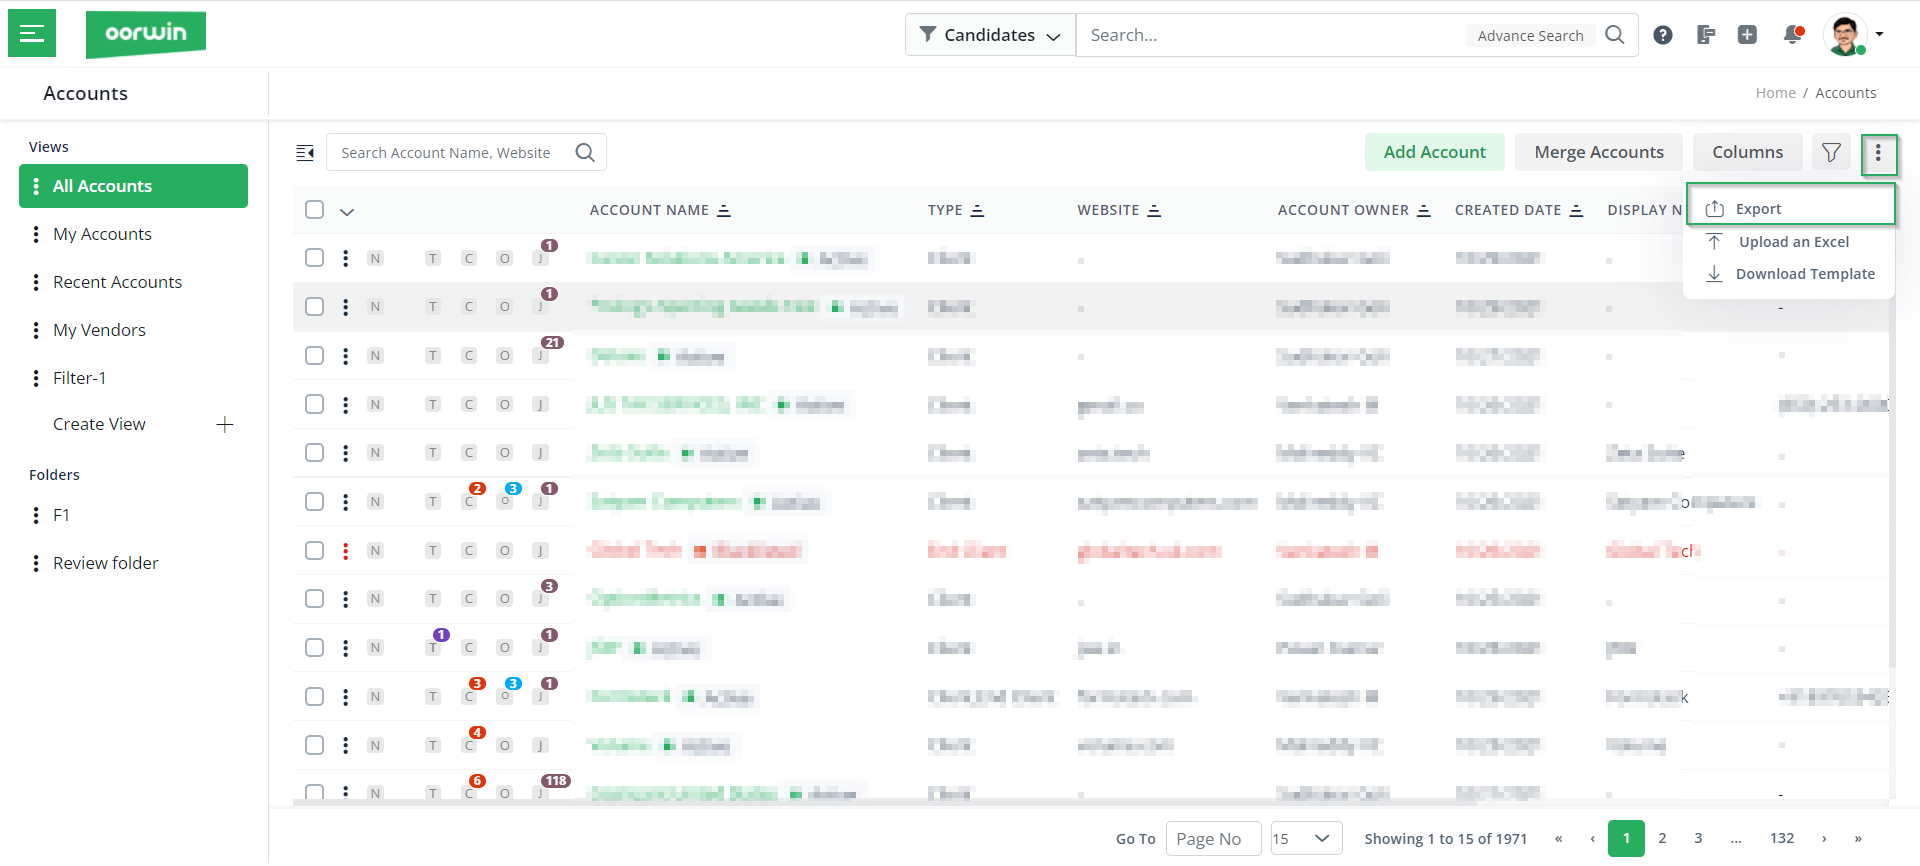
- Then, choose the columns, for which you wish to export the data and then click on Export as Excel/ CSV based on the requirement.
Upload a database of accounts
- Uploading a database of accounts is made easier in Oorwin, by providing an option to upload an excel file. To upload an excel file, click on the 3 dots on the top right-hand side, and click on Upload an Excel.
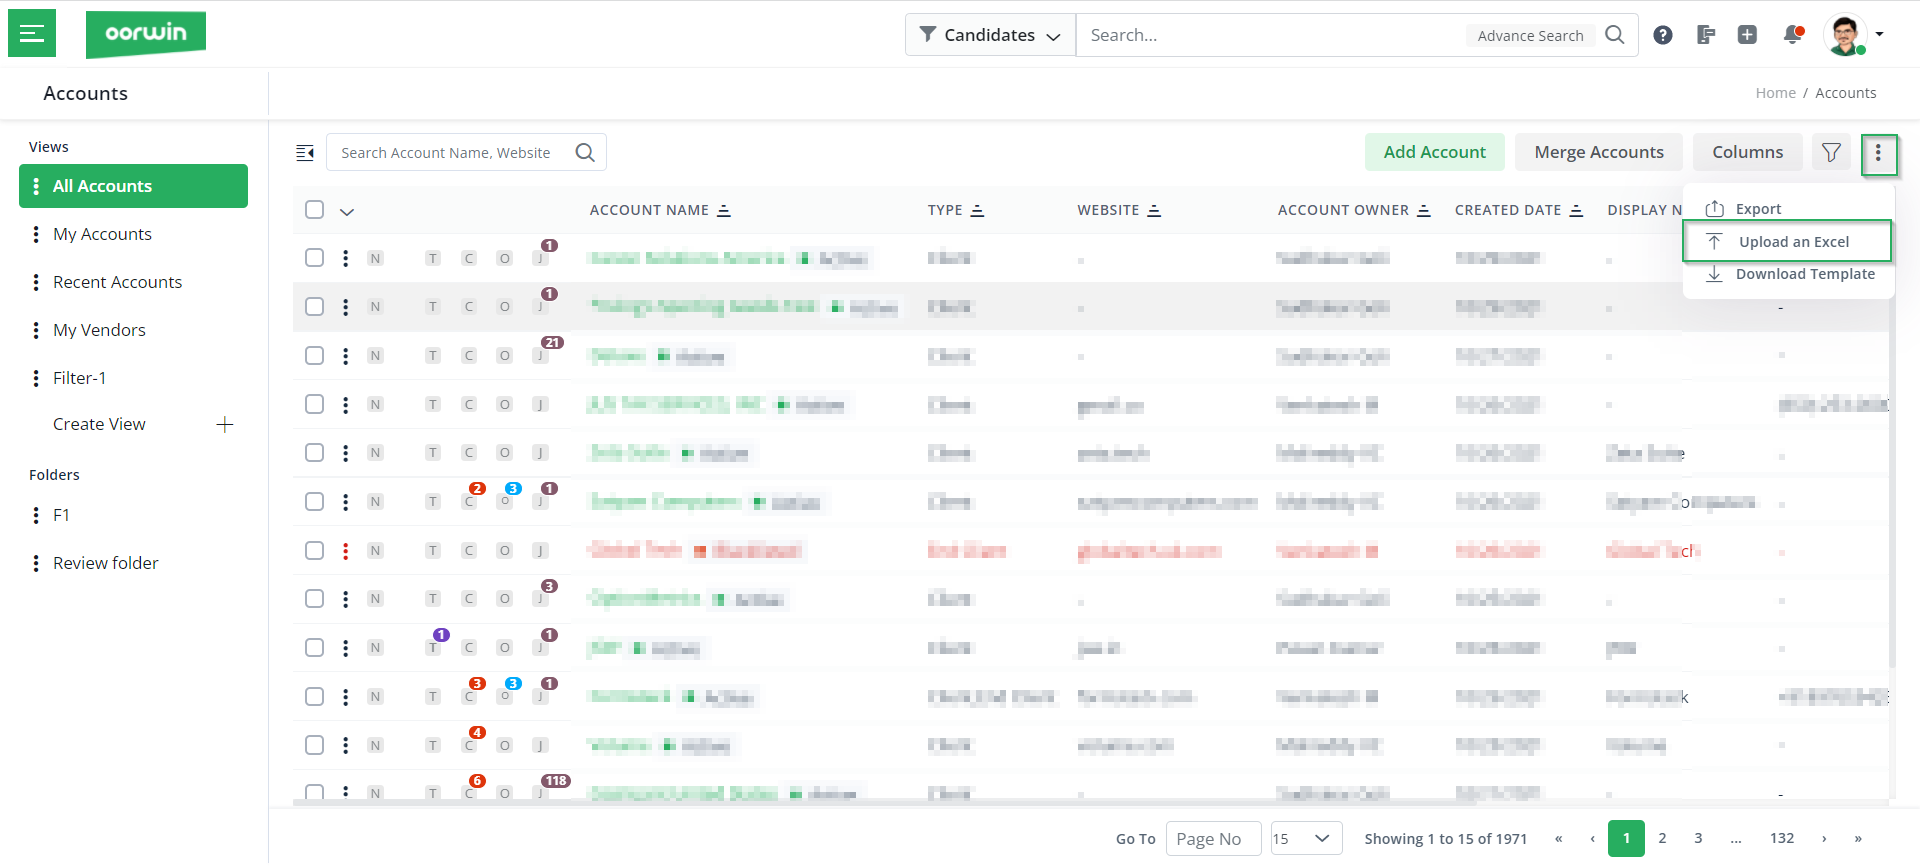
- Then choose the excel file and click on Open. Here, please note that you have to maintain the excel file format according to the sample template that you can download. Refer below to understand the steps to download the template.
Download templates
- To download templates, click on the 3 dots on the top right-hand side, and click on Download Template.
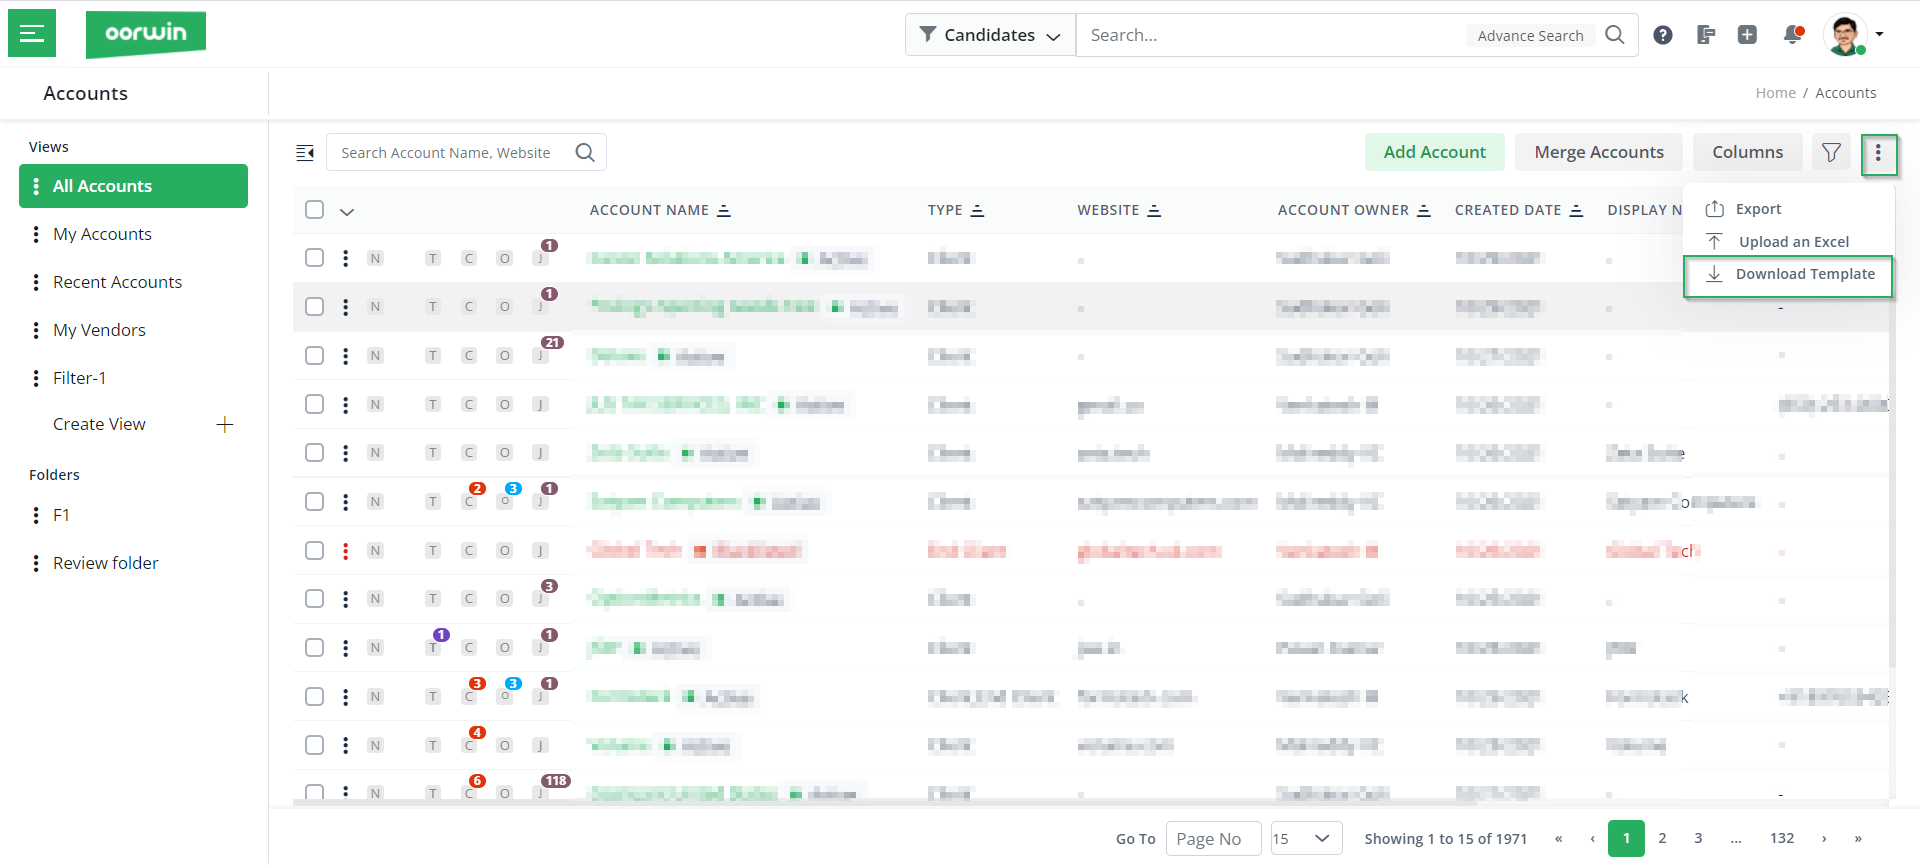
- Once you click on Download Template, you will see the accounts template downloaded. Next, let us understand the most used keywords in the accounts section of the Oorwin dashboard.
Oorwin Accounts Terminology
| Name | Definition |
|---|---|
| Accounts | Provides details of the client companies |
| Blacklist Account | Restricts account-related actions across the system including adding candidates, adding jobs, etc. |
| Company Contact Search | Search and fetch contact information related to any particular company |
| Customer Insights | Shows primary contacts, annual revenue, past deals, etc. |
| Do not Publish Jobs | This will restrict users from publishing a job online related to this account. |
| Invoice Insight | Shows invoices generated in the selected period for the client with their statuses |
| Merge Account | Merge up to three accounts with common fields and information. After the merge, only master records will be stored in the database and the rest will be deleted. |
| Primary Contact | The primary point of contact for that account |
| Search Contact | Lets you search the internal database for contact information |
| Vendor Candidate | If an account is a vendor type, this will show all candidates who have been sourced by the account. |
If you wish to get to know some other keywords used in Oorwin, you can refer to our Oorwin Terminologies article. With this, we come to this article. If you are interested to know more about Oorwin’s products, take a product tour today or contact us on +91-8977801805 / USA: +1877-766-7946 to talk to our product advisors.
Get the latest Oorwin releases, updates, success stories & industry news